Getting started
Item setup
Catalog management
Walmart Fulfillment Services (WFS)
WFS basics
Getting started with WFS
WFS item setup
Shipping to WFS
WFS Inventory management
Walmart Cross Border - Imports
Walmart Multichannel Solutions
WFS growth opportunities
WFS policies & standards
WFS prohibited products policy
WFS prohibited products policy: Live plants
WFS prohibited products policy: DOT fully regulated hazardous items
WFS prohibited products policy: Pesticide products and devices
Seller suspension and termination
WFS hazardous materials (hazmat): Overview
WFS compliance: Safety Data Sheets (SDS)
WFS compliance: Batteries
WFS shipping plans: Distribute inventory yourself
WFS programs & services
Troubleshooting
Seller Fulfillment Services
Listing optimization
Order management
Taxes & payments
Policies & standards
Growth opportunities
Advertising
Walmart Seller app


When you send inventory to Walmart Fulfillment Services (WFS), you’re required to send your inventory to all assigned fulfillment centers. This may mean shipping to locations across the country, which helps with next-day and weekend delivery to customers. If your items are stored closer to where customers live, they can get their orders faster. In this guide, we’ll explain the expectations and process when you distribute inventory yourself.
Why do I need to distribute inventory?
Shipping to multiple locations may feel like extra work, but distribution is one of the most powerful ways to grow your business. By sending your inventory to assigned fulfillment centers, you can improve delivery to customers, including next-day and weekend coverage. This can mean happier customers, more sales and better visibility across the marketplace.
If you prefer to send just a single shipment, you can always use the Inventory Transfer Service (ITS). We’ll take care of splitting the inventory for you and making it available nationwide.
Guidelines
If you distribute inventory yourself, you’ll need to manage multiple shipments, with each going to a separate location. Follow the same process you usually do, but pack, label and track each shipment separately.
Send all shipments within 30 days
You must send all shipments within 30 days of the first shipment. For example, let’s say you have 3 shipments. If you send shipment 1 on June 17, then you must send both shipments 2 and 3 by July 17.
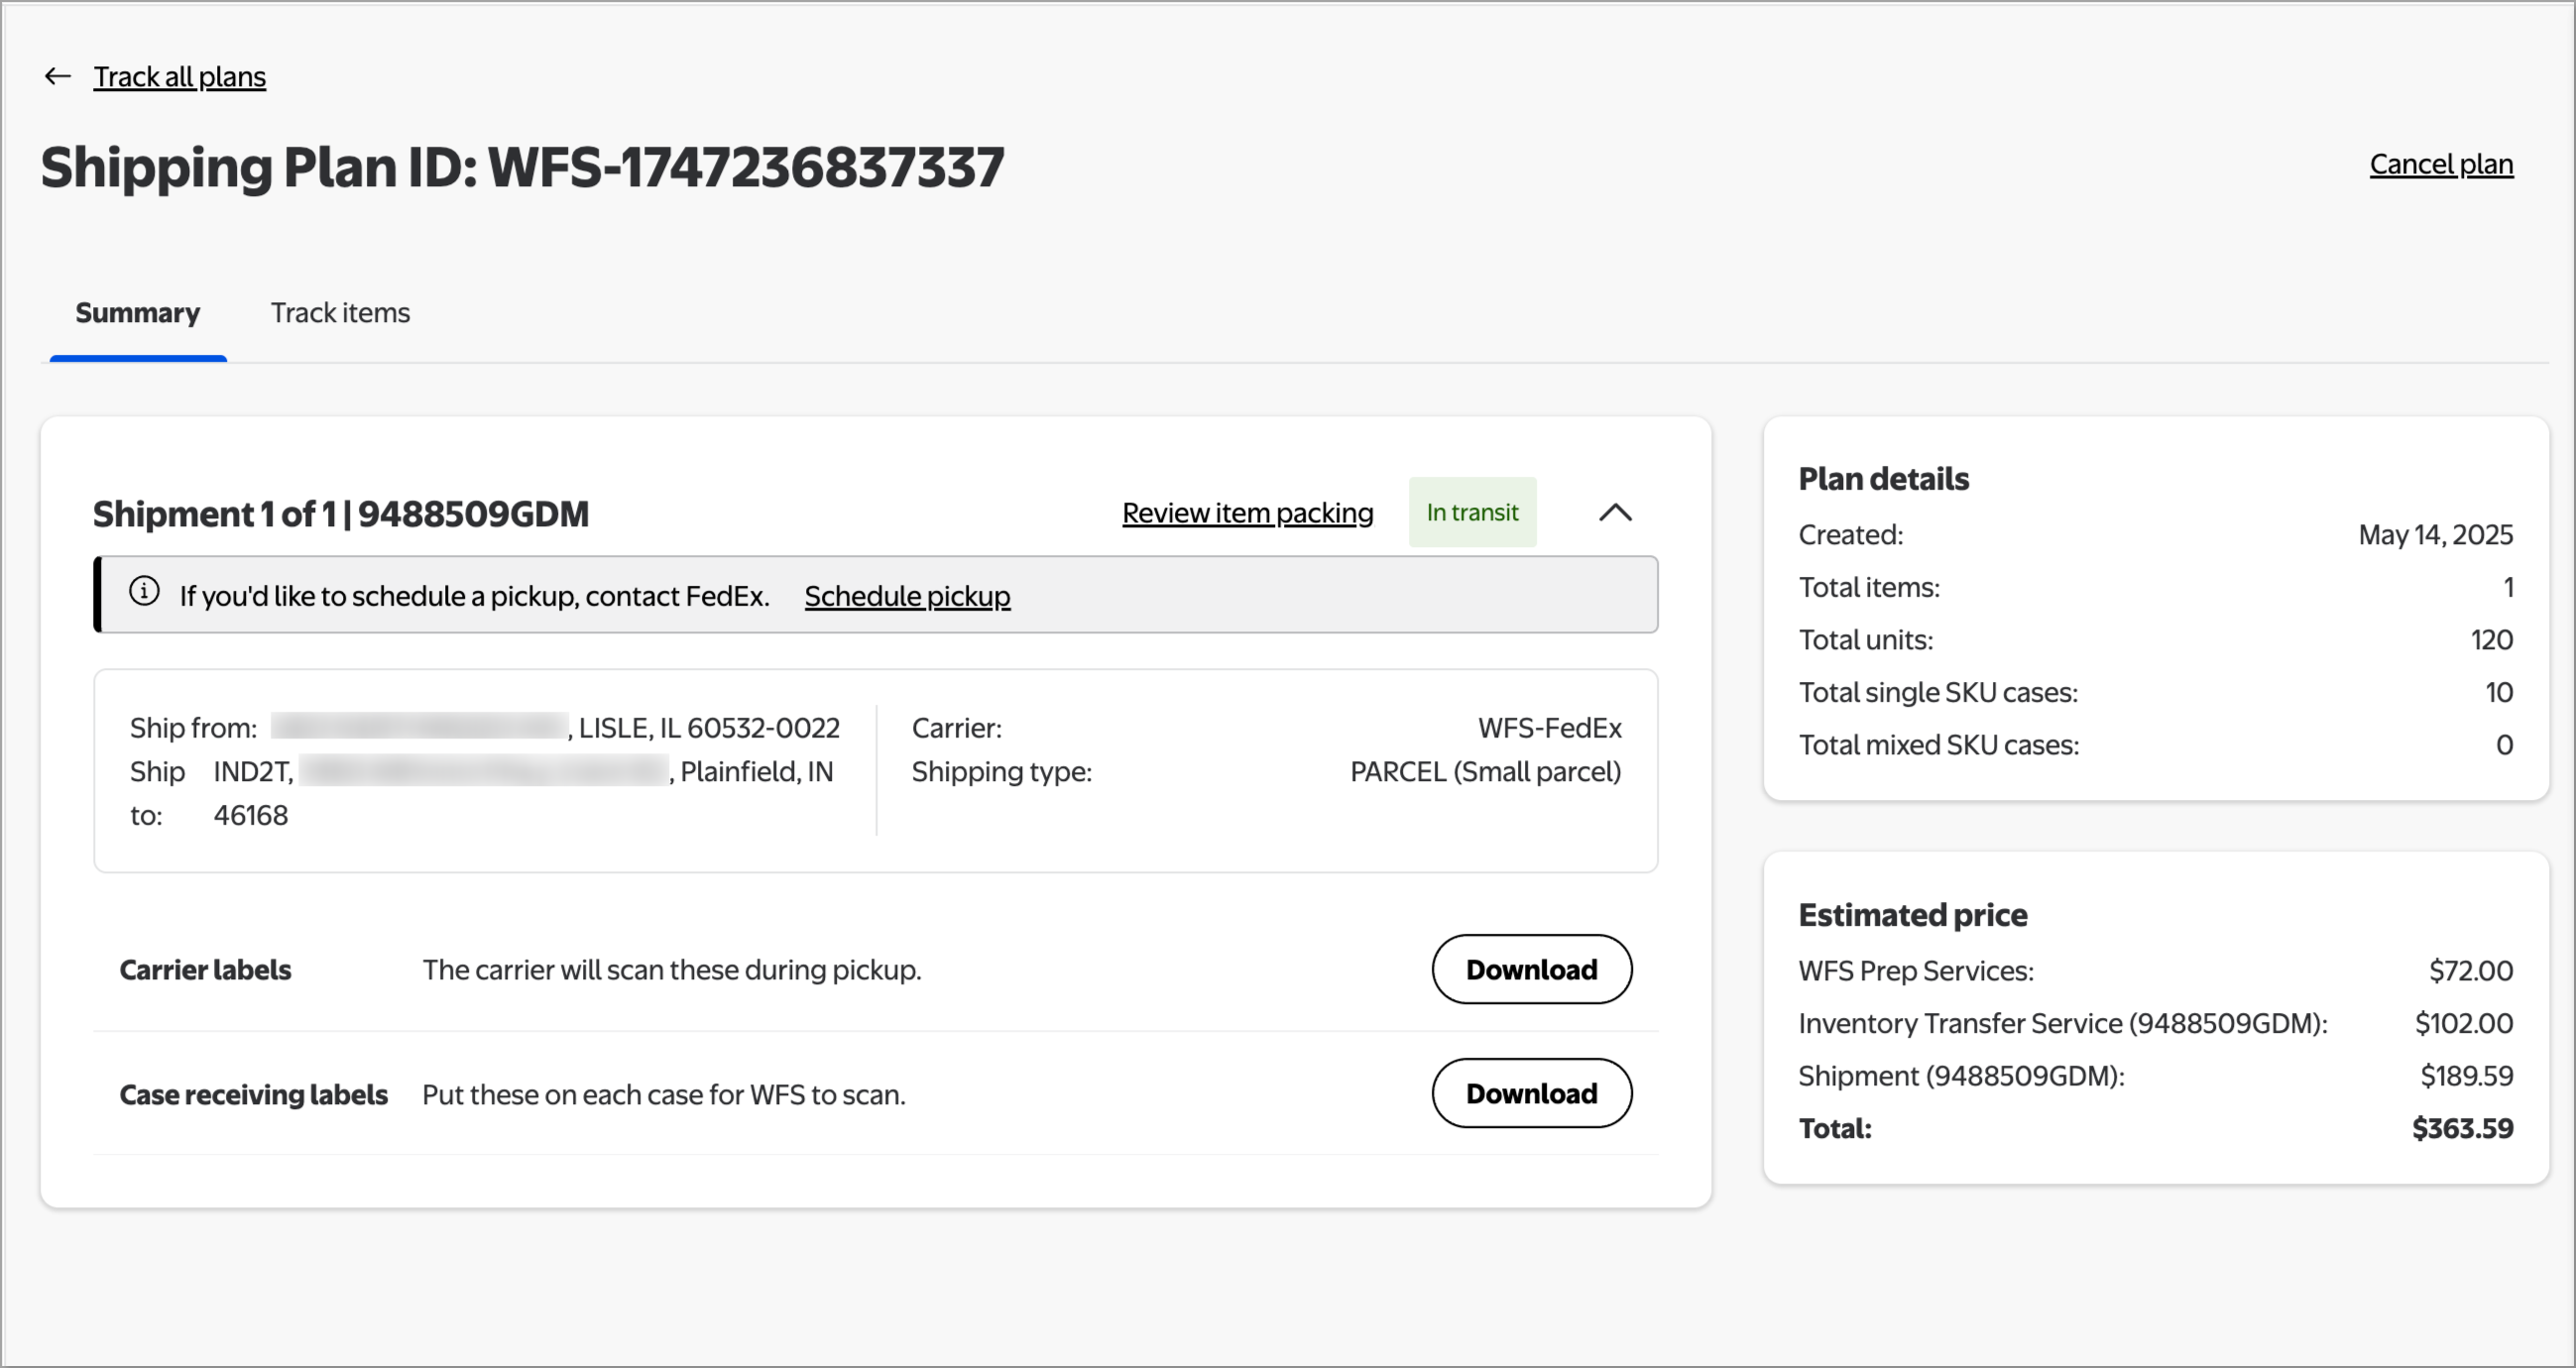
To check which fulfillment center each shipment goes to, go to the Shipping Plans page and select View plan. Each shipment will have an address listed next to Ship to.
You must ship to all fulfillment centers in your shipping plan. This includes packing and sending items as assigned to each location.
Review item packing
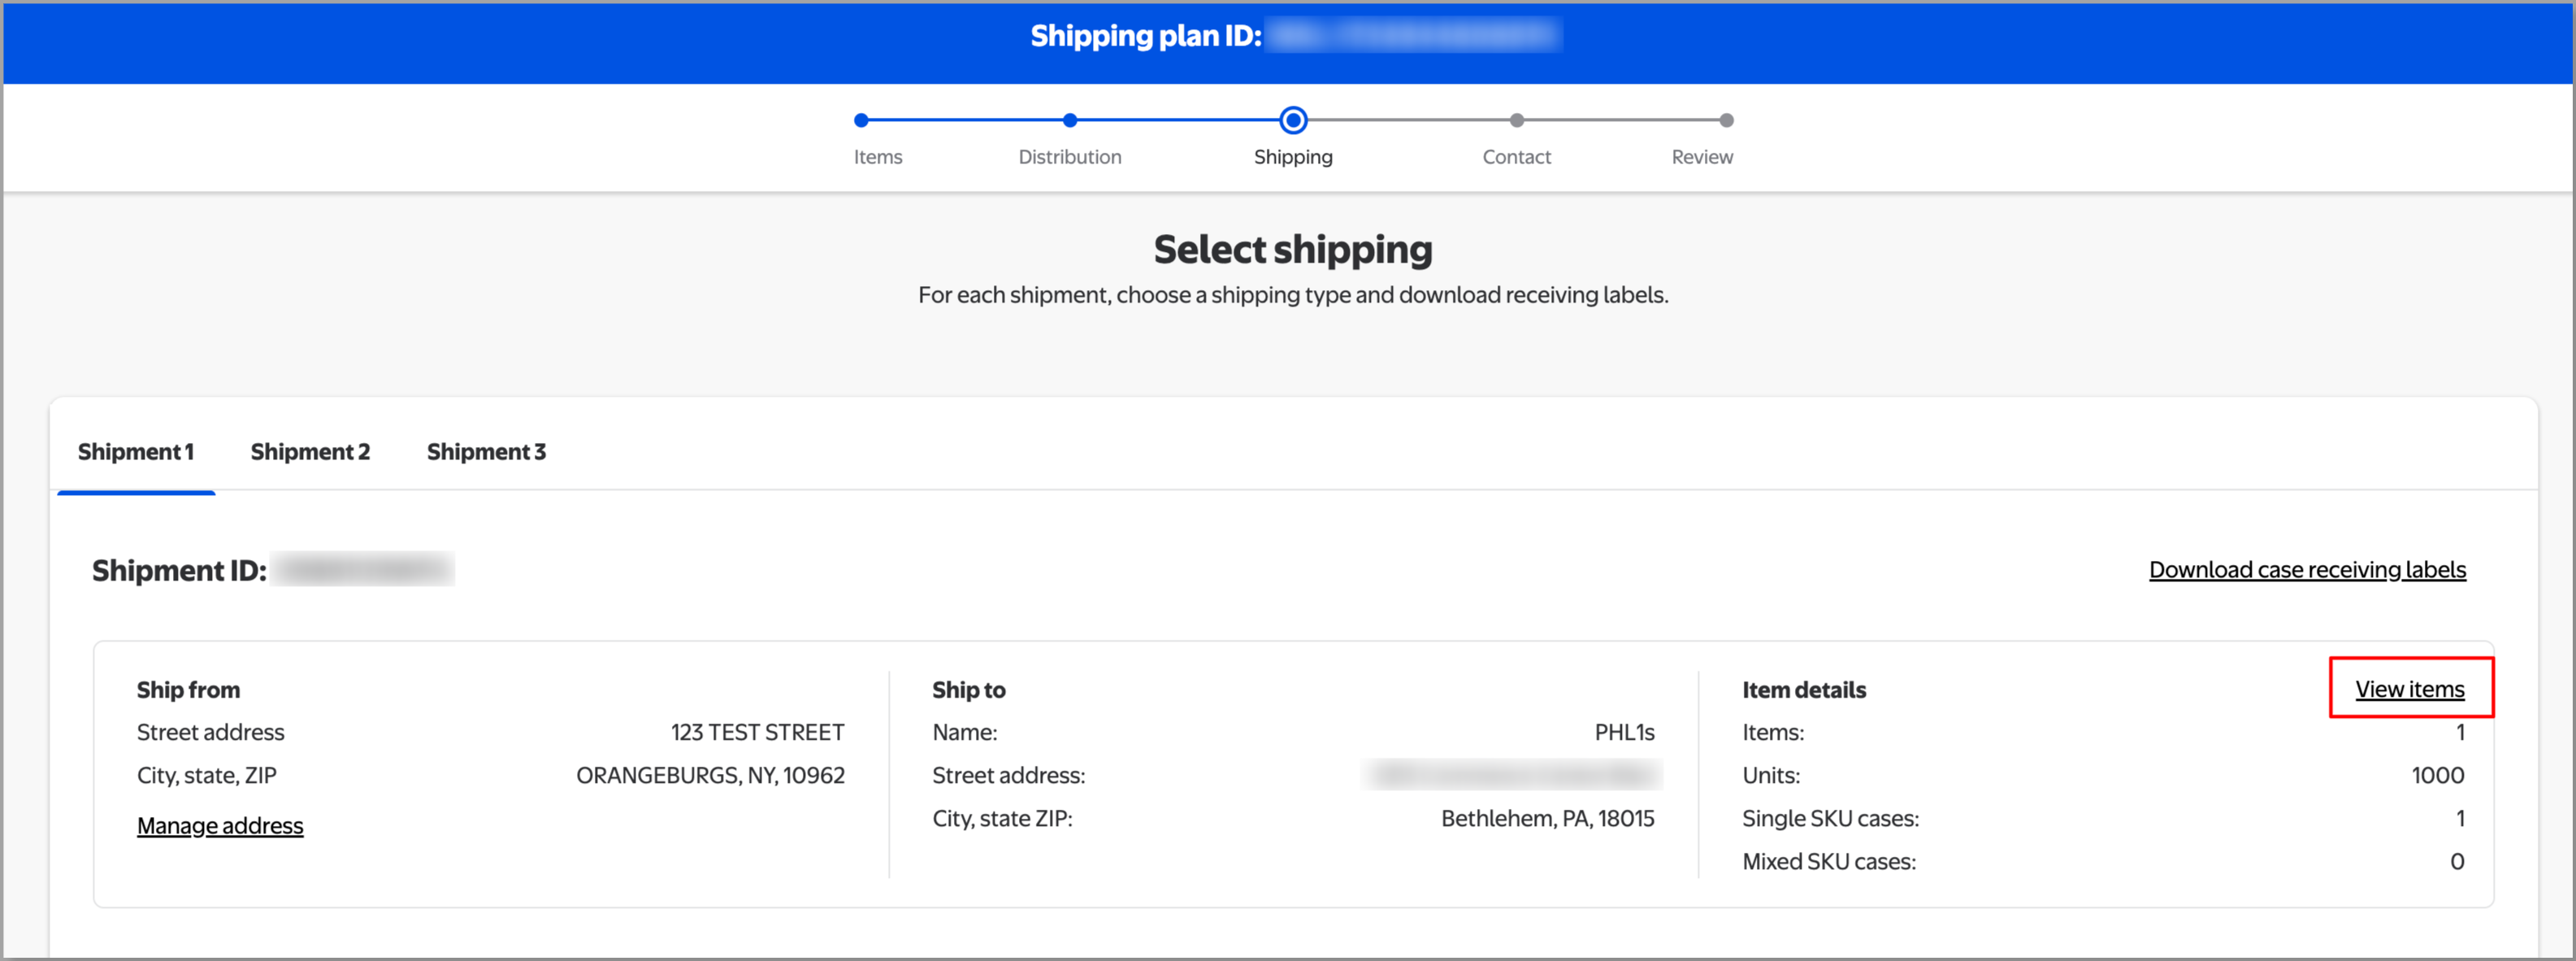
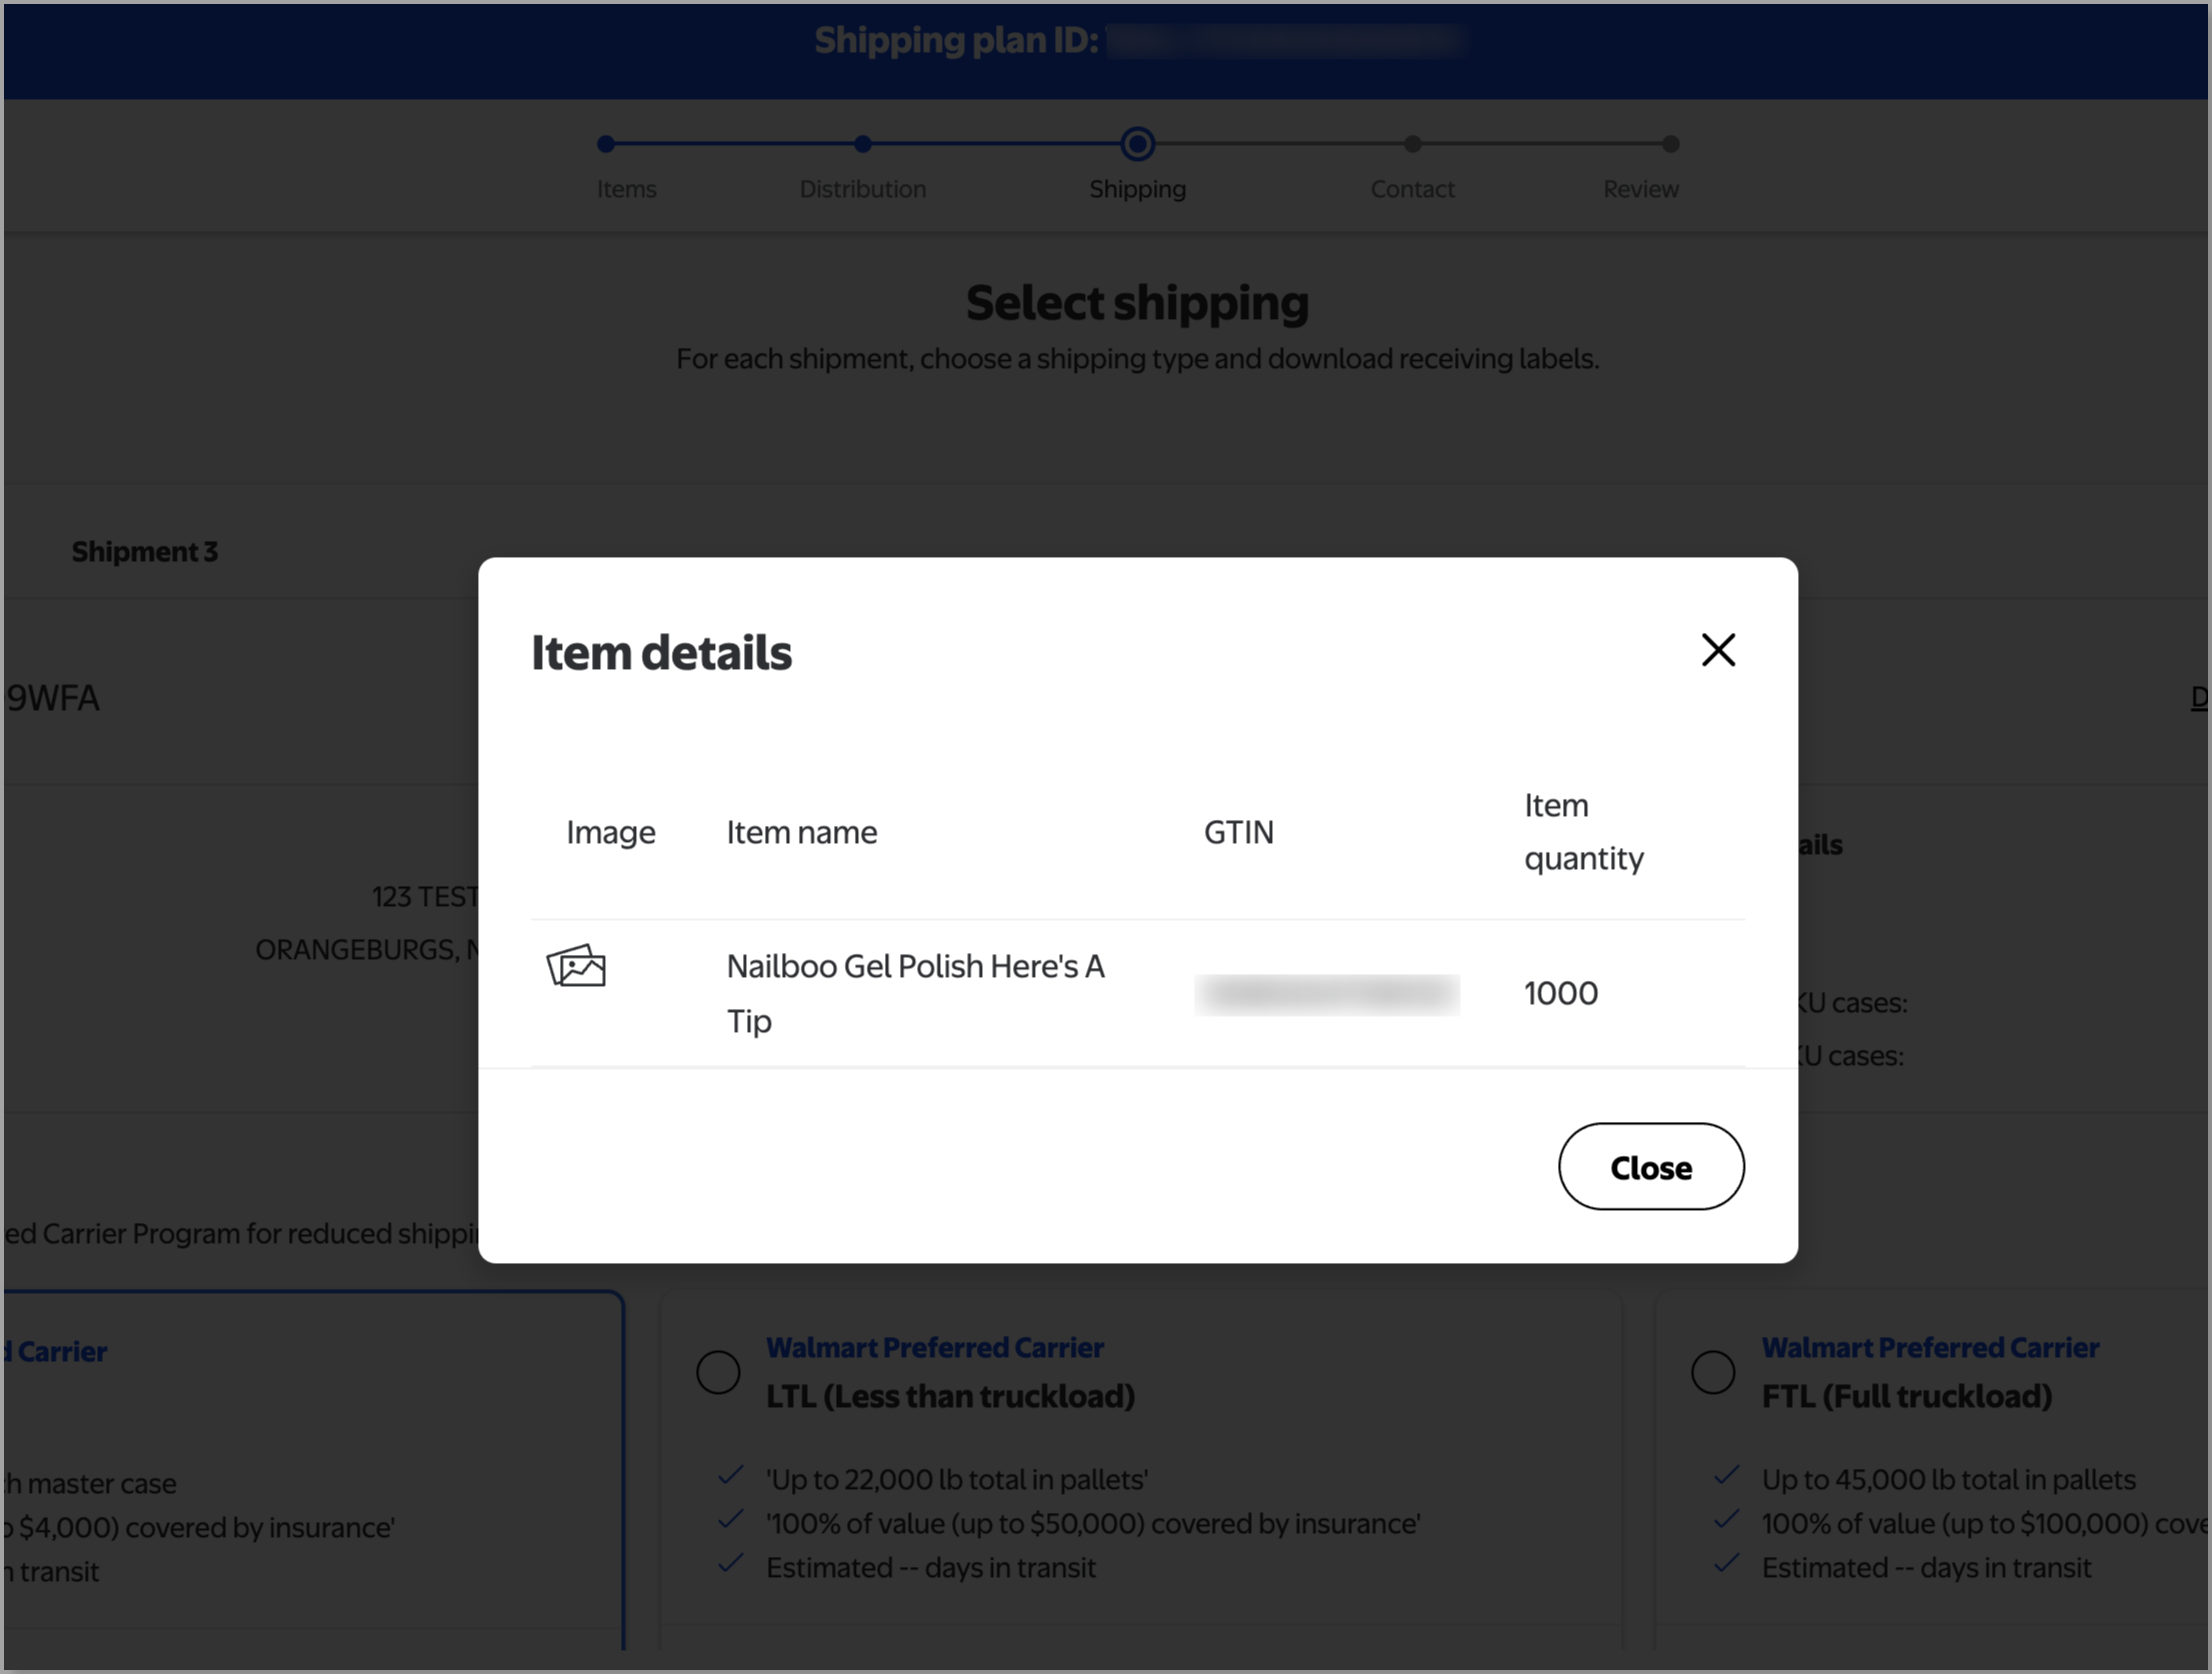
When you create a shipping plan, we’ll tell you which items are assigned to which shipment. You must ship items to their assigned fulfillment centers. If you haven't submitted a shipping plan yet, you can check how items are split in the Shipping step. Select View items in each shipment tab to open a list of items.
If you’ve already submitted the shipping plan, you can still view items. On the Shipping Plans page, select View plan and select Review item packing for each shipment.
If you’re integrated with our APIs, use Get Shipments to see which items and quantities are needed for each shipment.
Print receiving labels
Stick receiving labels to each master case, so the fulfillment center can scan and confirm what’s in the shipment. If you’re sending pallets, you’ll need both case and pallet receiving labels. To print receiving labels, go to the Shipping Plans page and select View plan. For each shipment, download the case and pallet labels.
Print carrier labels
If you’re using a Walmart preferred carrier, download a carrier label for each shipment. If you’re using your own carrier, make sure to get labels from them and add the tracking numbers to Seller Center.
Pack and palletize each shipment
Prepare each shipment, following the WFS Routing and Packaging Guidelines. Shipments that do not follow these guidelines may be rejected or shipped back to you at your expense.
To make receiving more efficient, we recommend these limits for each master case:
Maximum length of 31.5 inches
Maximum width of 23.25 inches
Maximum height of 16 inches
Maximum weight of 50 lb
How to choose distribution
Depending on your inventory type, you may see 2 options when you create a shipping plan:
If you choose Inventory Transfer Service, you’ll send inventory to a single transfer station.
If you choose to distribute inventory yourself, you’ll send it to your assigned fulfillment centers. This may mean splitting your inventory and packing multiple shipments.
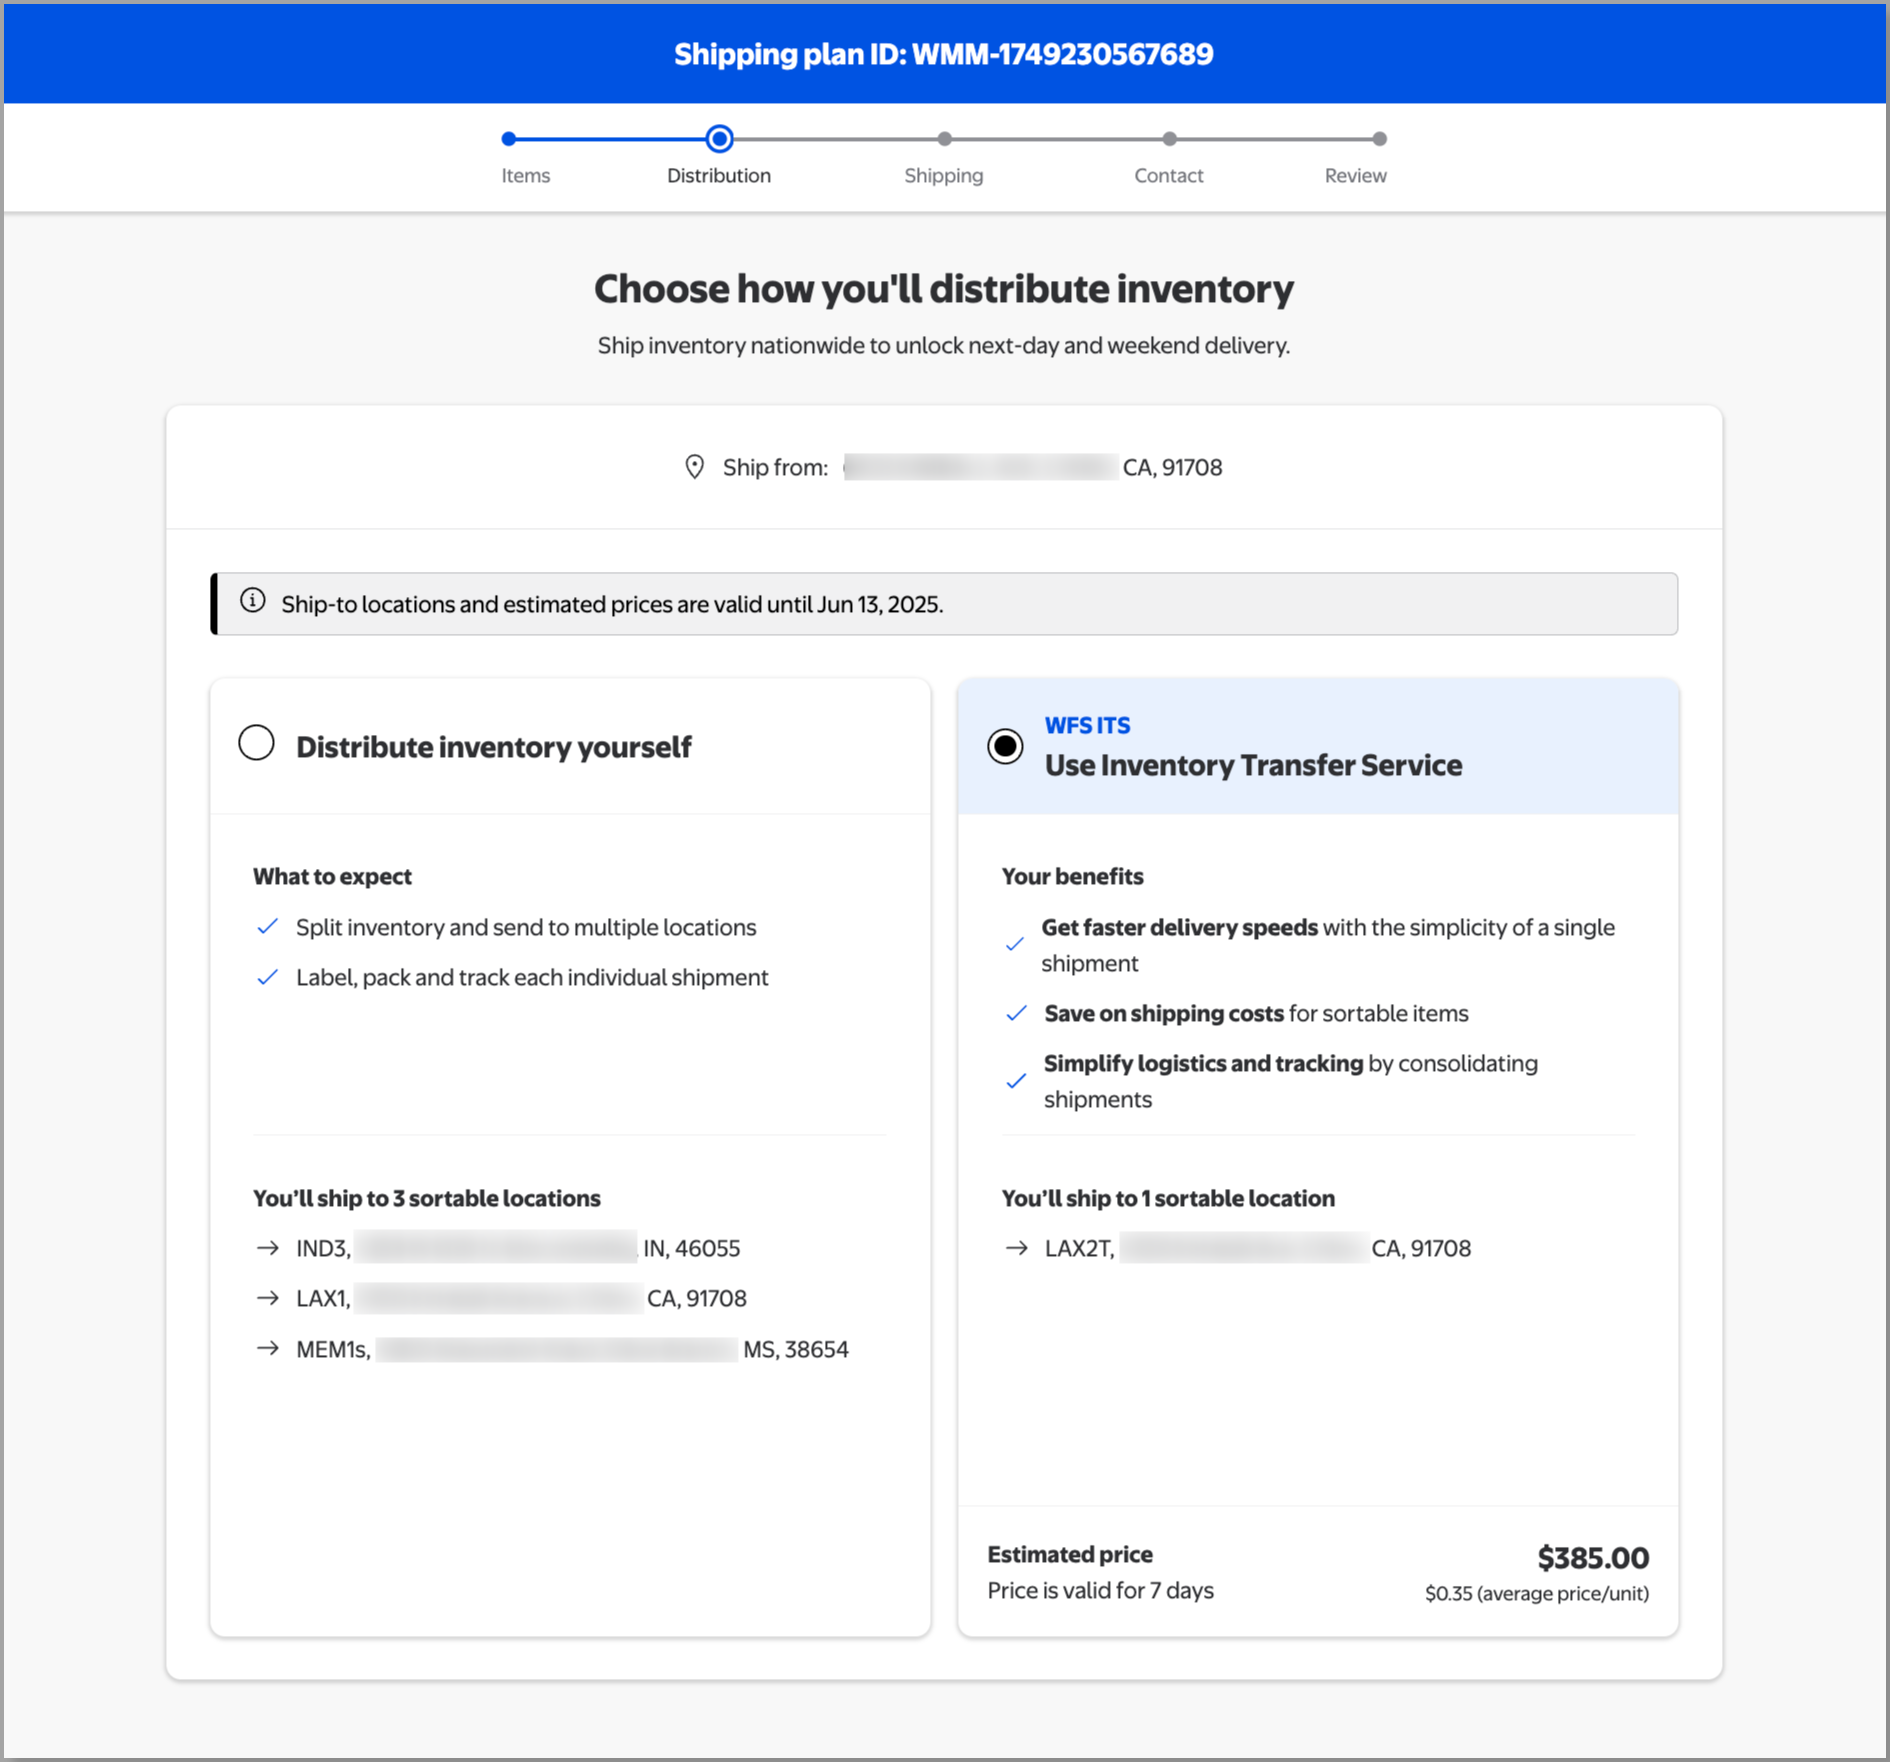
Some shipping plans may not have ITS because your items aren’t sortable or eligible. Sortable items are less than 30 lb (13.6kg) with maximum dimensions of 25" x 20" x 14" (63.5 cm x 58.4 cm x 35.5 cm).
If you’re integrated with our APIs, use Fetch Inbound Preview to preview the locations for ITS and distributing yourself.
Manage shipping
On the Shipping step, you'll see a tab for each shipment based on the location. Make sure to fill in the details for each tab before moving on. We’ll also tell you which items should go in which shipment, so select View items to check how your inventory is split.
For more detail on creating shipments, view Send domestic inventory.