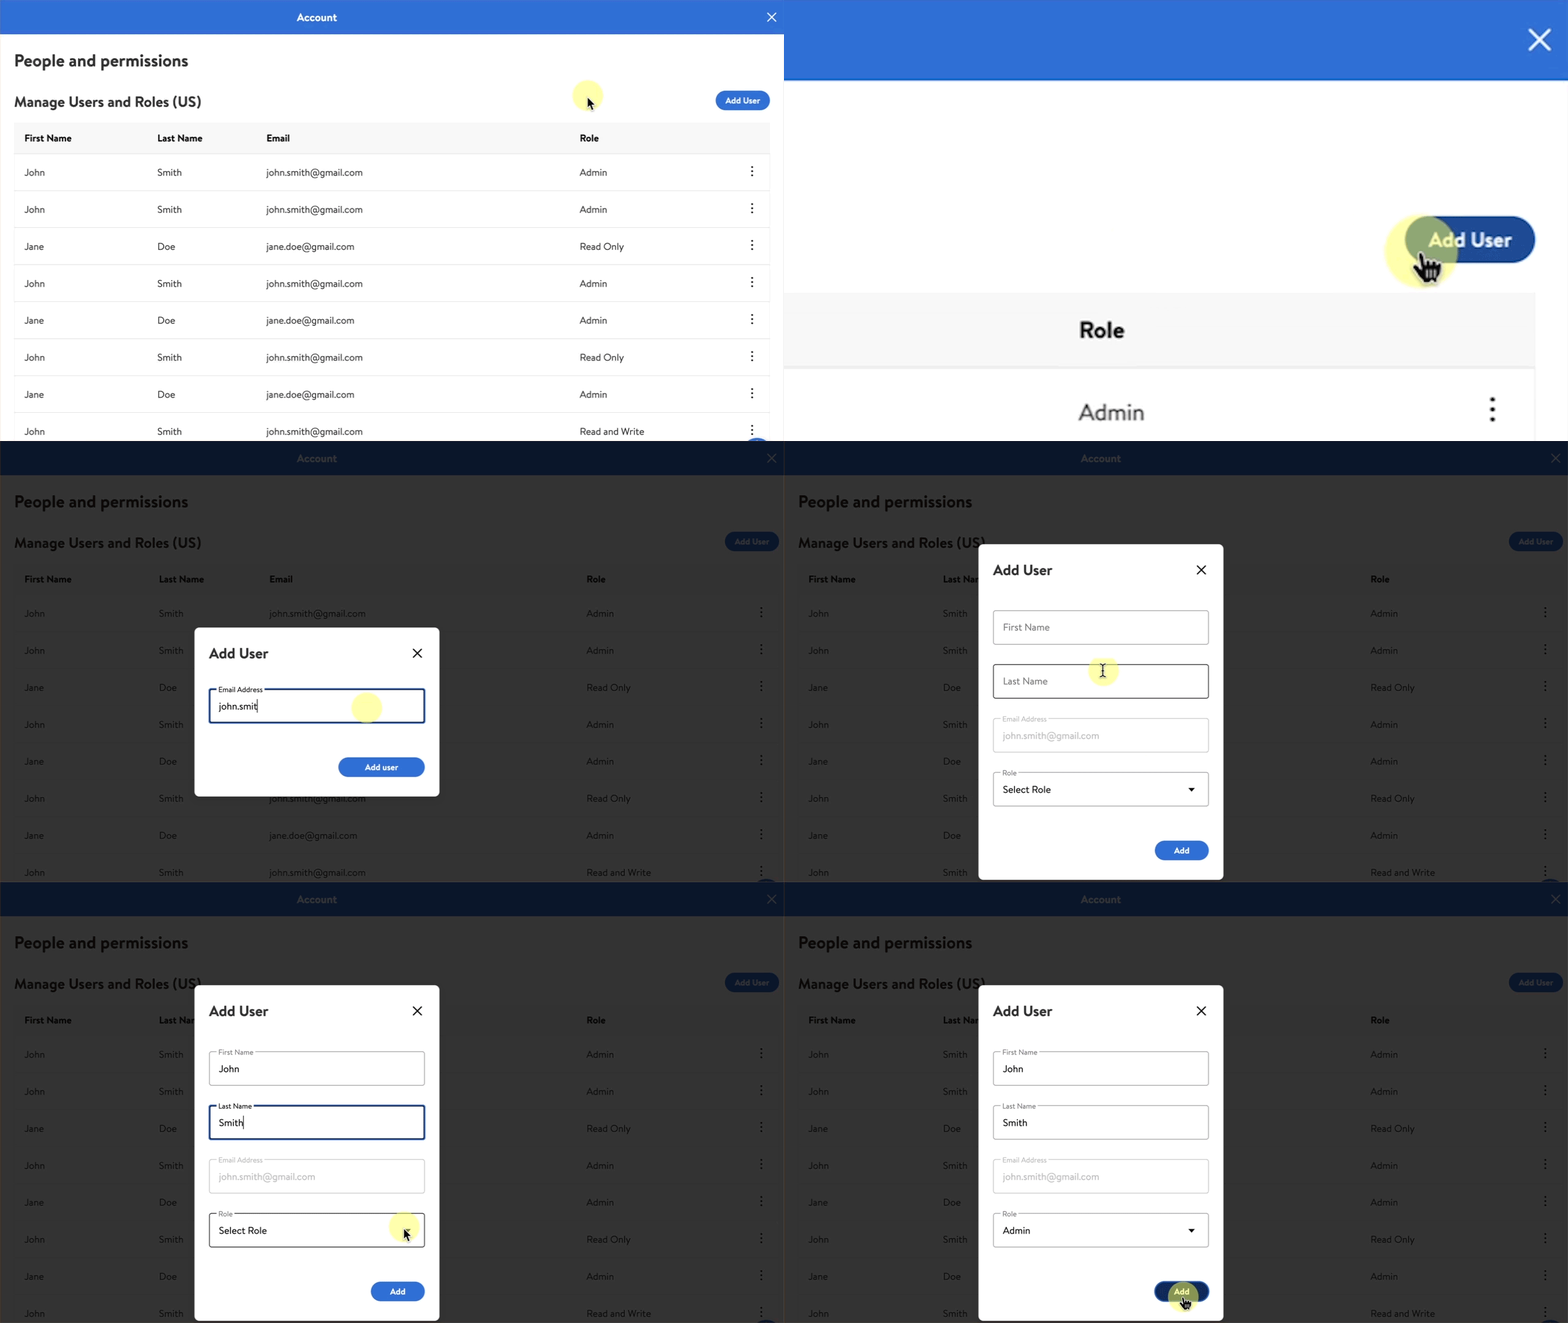
As a Walmart Marketplace seller, you may need to add a new user to your Seller Center account for various reasons, such as granting access to another member of your organization. Only sellers with admin level access can add users within Seller Center. The process is quick and easy; this guide will show you how to do it.
If you do not have admin level access, reach out to your account administrator for help.
User roles
Admin: Admin access gives the user the ability to manage and make updates to all areas in Seller Center including:
Generating credentials to access Walmart's Rest APIs.
Requesting access to sell in special approval categories.
Creating new user accounts to provide Seller Center access to members of your company.
Reviewing, signing and accepting binding legal agreements in Seller Center on behalf of the seller.
Read and Write: Read and Write access gives the user the ability to perform operational tasks in Seller Center such as setting up items or viewing reports.
Read Only: Read Only access gives the user the ability to view data or create and download reports. Users with Read Only access cannot update or modify existing data.
You're responsible for your user's actions. Designate your user permissions carefully and limit Admin access to individuals in your company who can accept binding terms on behalf of your company.
Add a new user
Step 1 – Get started
Navigate to the People and permissions page in Seller Center.
Step 2 – Add user
Select Add User at the top right. As a reminder, only sellers with admin level access can add users within Seller Center.
Step 3 – Add user info
Enter the new user’s information, including their name, email address and their role. Select Add to send an email invitation to the new user. The email will include a link that the new user can use to create their account and set their password.
