Getting started
Item setup
Catalog management
Walmart Fulfillment Services (WFS)
Seller Fulfillment Services
Listing optimization
Order management
Taxes & payments
Policies & standards
Growth opportunities
Advertising
Walmart Seller appNew


Promotional pricing allows you to offer customers great deals on your items. In this guide, you’ll learn how to use the Promotions page in Seller Center to create and view Active, Scheduled, Draft, Expired or Canceled Promotional Pricing.
Set up promo pricing
Step 1 – Get started
Navigate to the Promotions page under Pricing in Seller Center, where you can create new or manage existing promotions (e.g., active, scheduled, drafts, expired and canceled).
For an easy way to choose the right items and prices for your promotions, use the Set up suggested promotion feature to download a spreadsheet of your high-potential items, along with Walmart’s suggested Promo price for each one. Select Set up suggested promotion to get started.

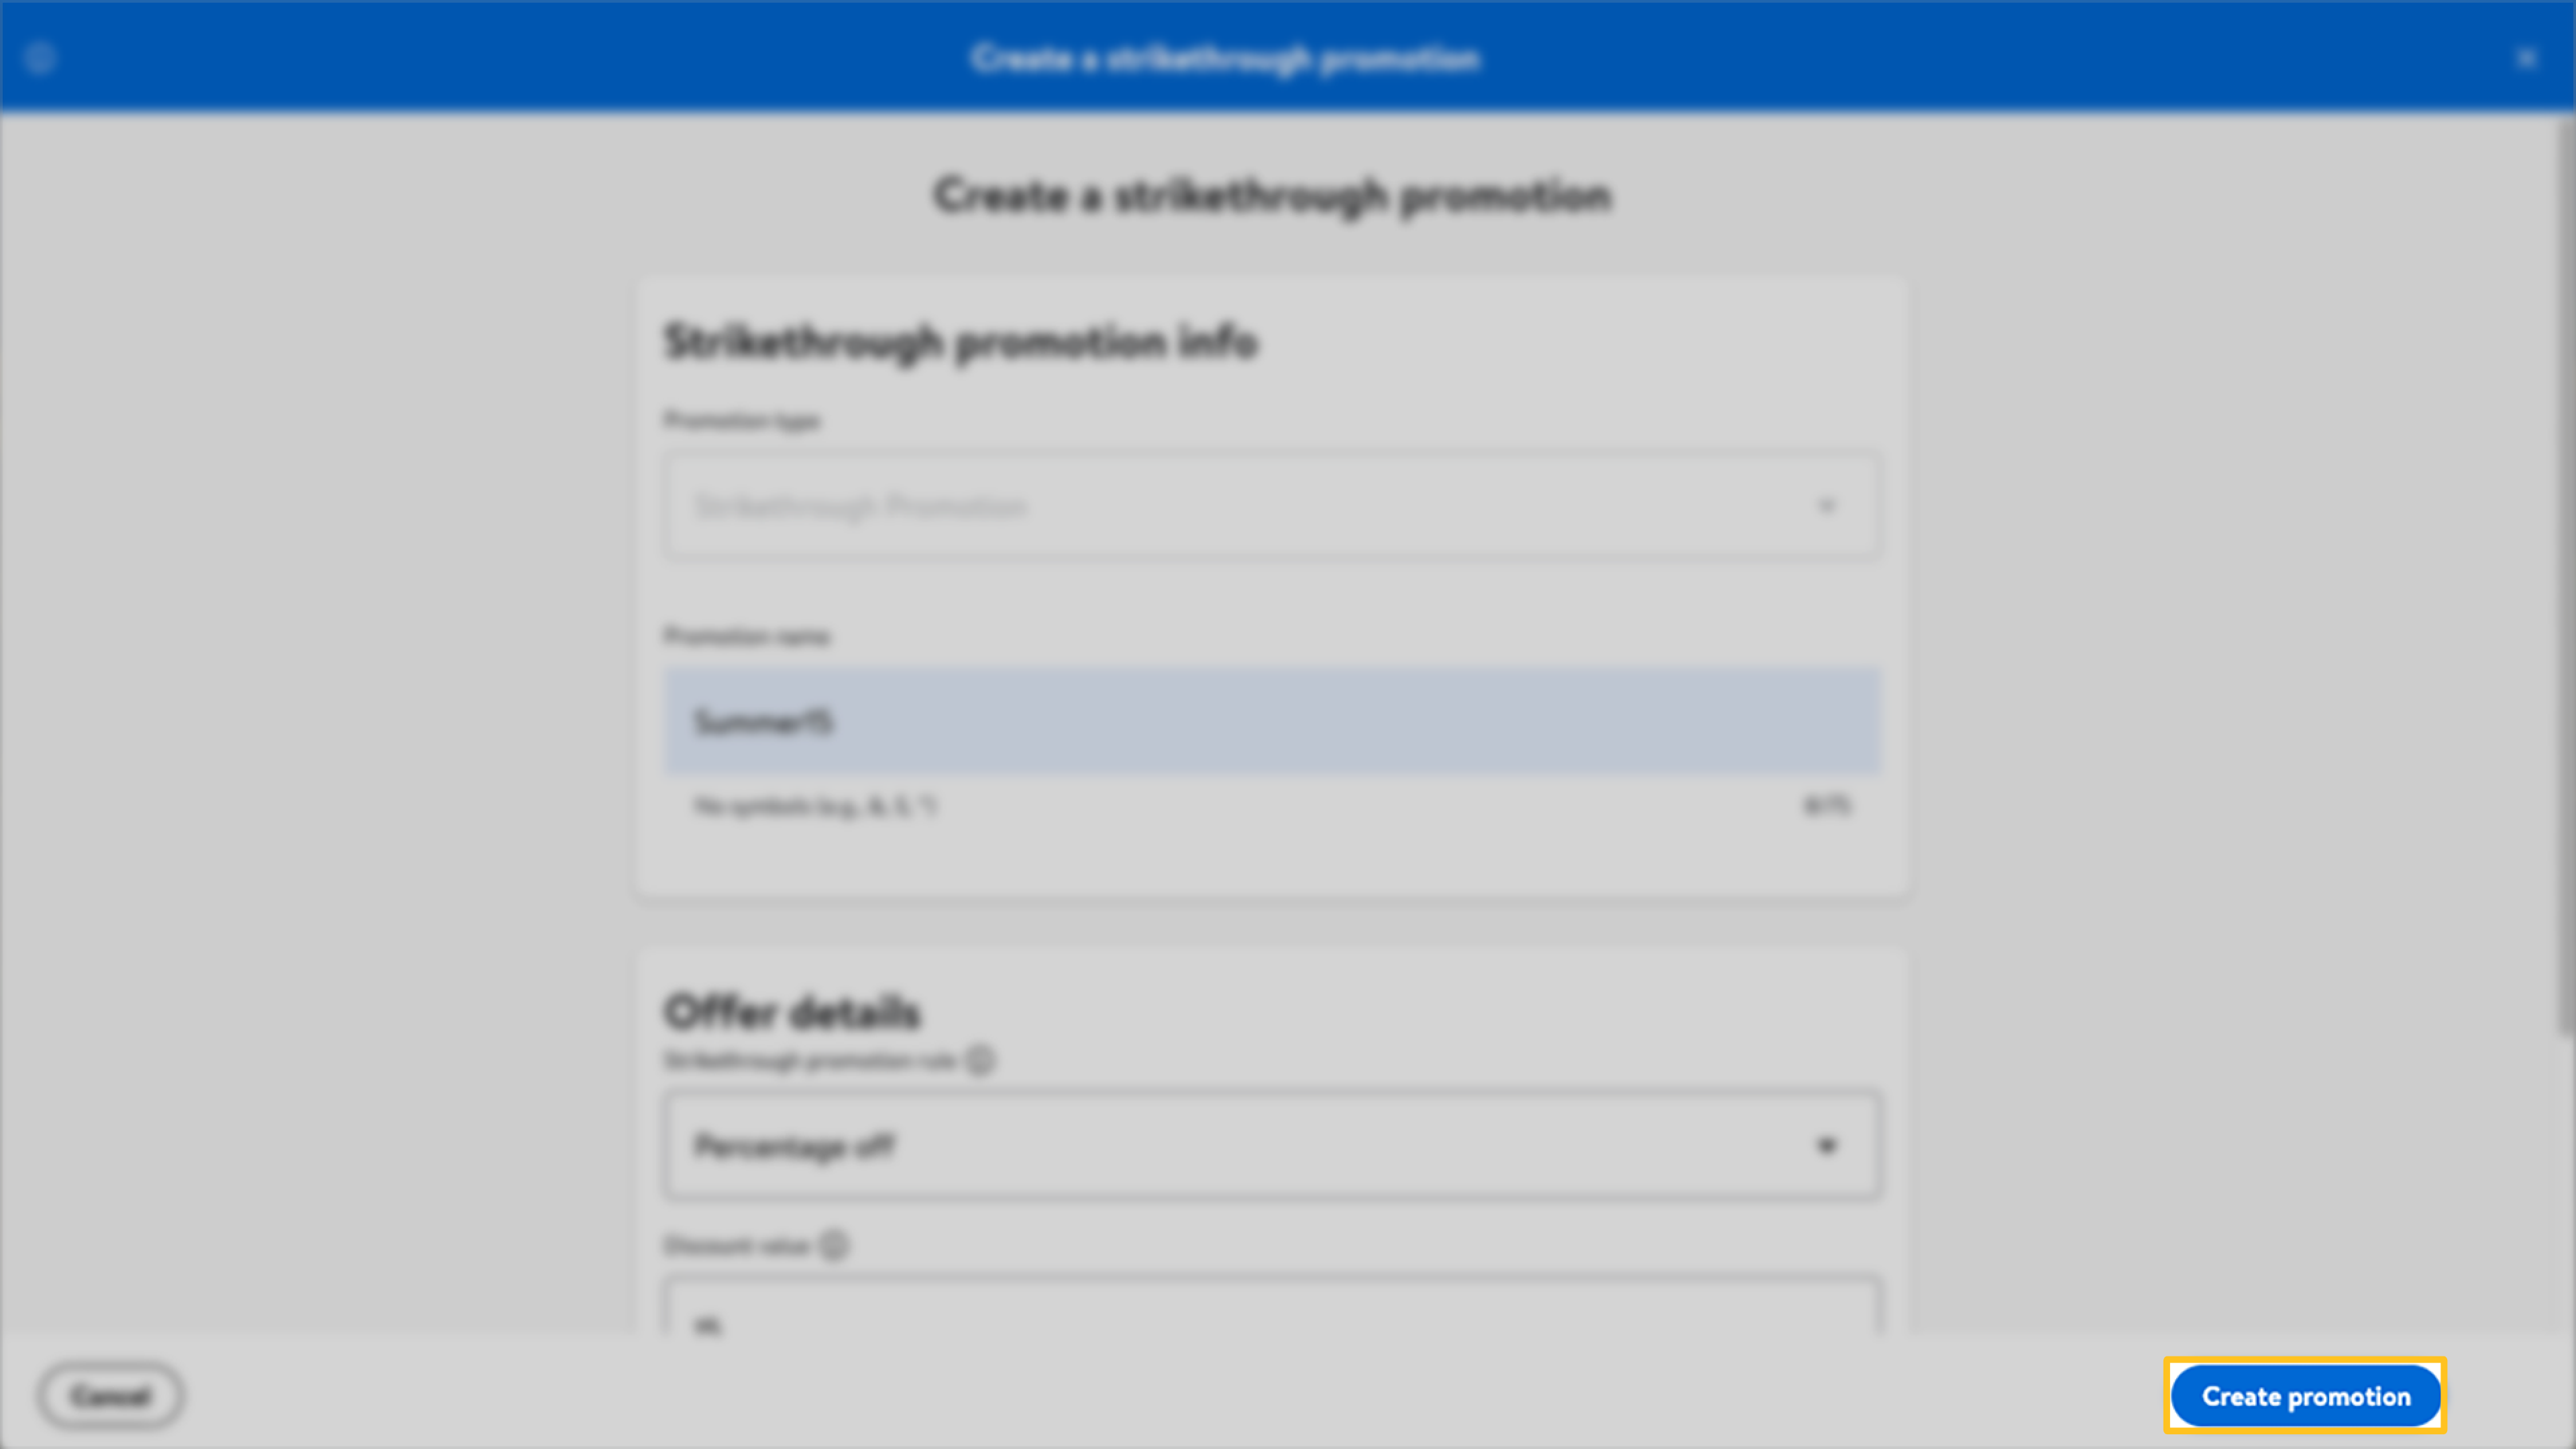
Step 2 – Create promotion
To create new promotions, select Create promotion and specify:
Promotion name: The name that will be used for that promotion group.
Discount Value: This indicates the value for the promotion group (ex., 5% off, $5 off).
- Strikethrough promotion rules:
- Percent off: This rule applies a percentage off for all items under your promotion group.
- Amount off: This rule applies a specific amount off for all items under your promotion group.
- Custom promo price: This rule defines the specific promotion price for each individual item under the promotion group.
Start date – End date: This is the promotion start through end date for the promotion group.
Start time – End time: This is the promotion start through end time for the promotion group.
A promotion must be set at least four hours before you want the promo to begin. As a reminder, the start and end times of your promotions are in Universal Time Zone (UTC) and not in your local time zone.
Step 3 – Add items
Once you’ve created your Promotion, navigate back to the Promotions page. Then, choose your promotion and select Assign items. You can add items to your promotion from your catalog or by using a template.
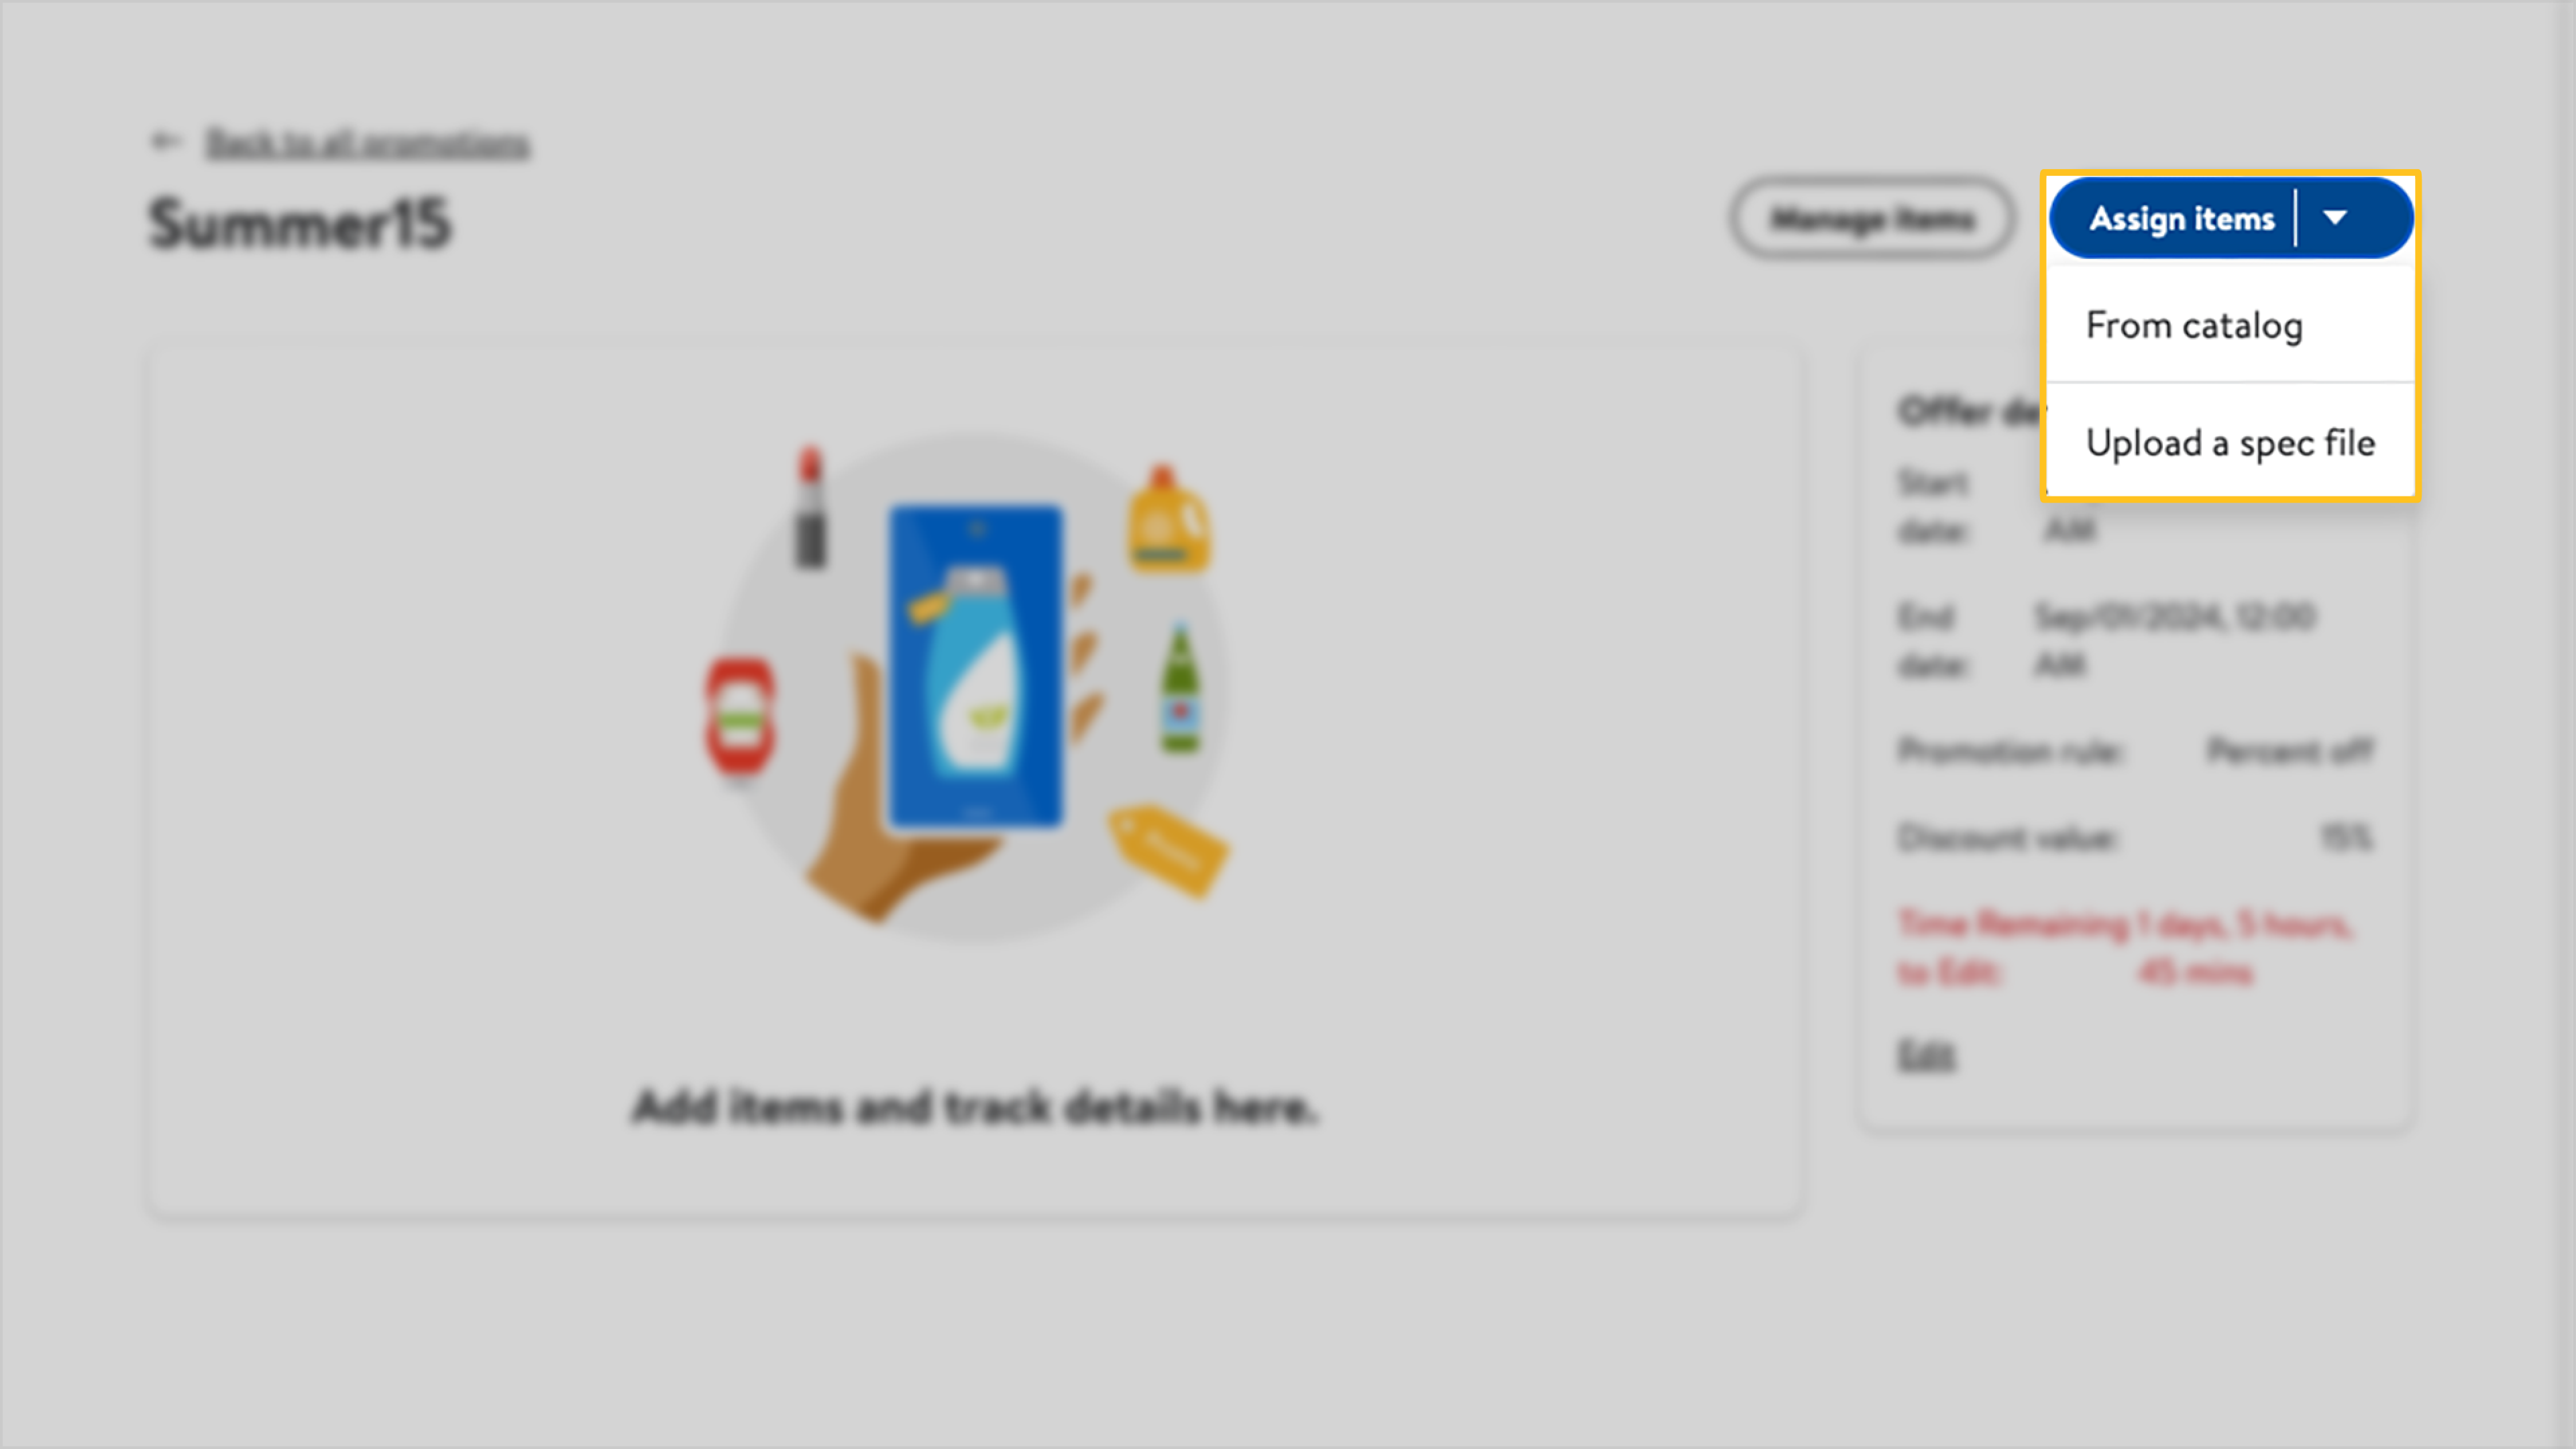
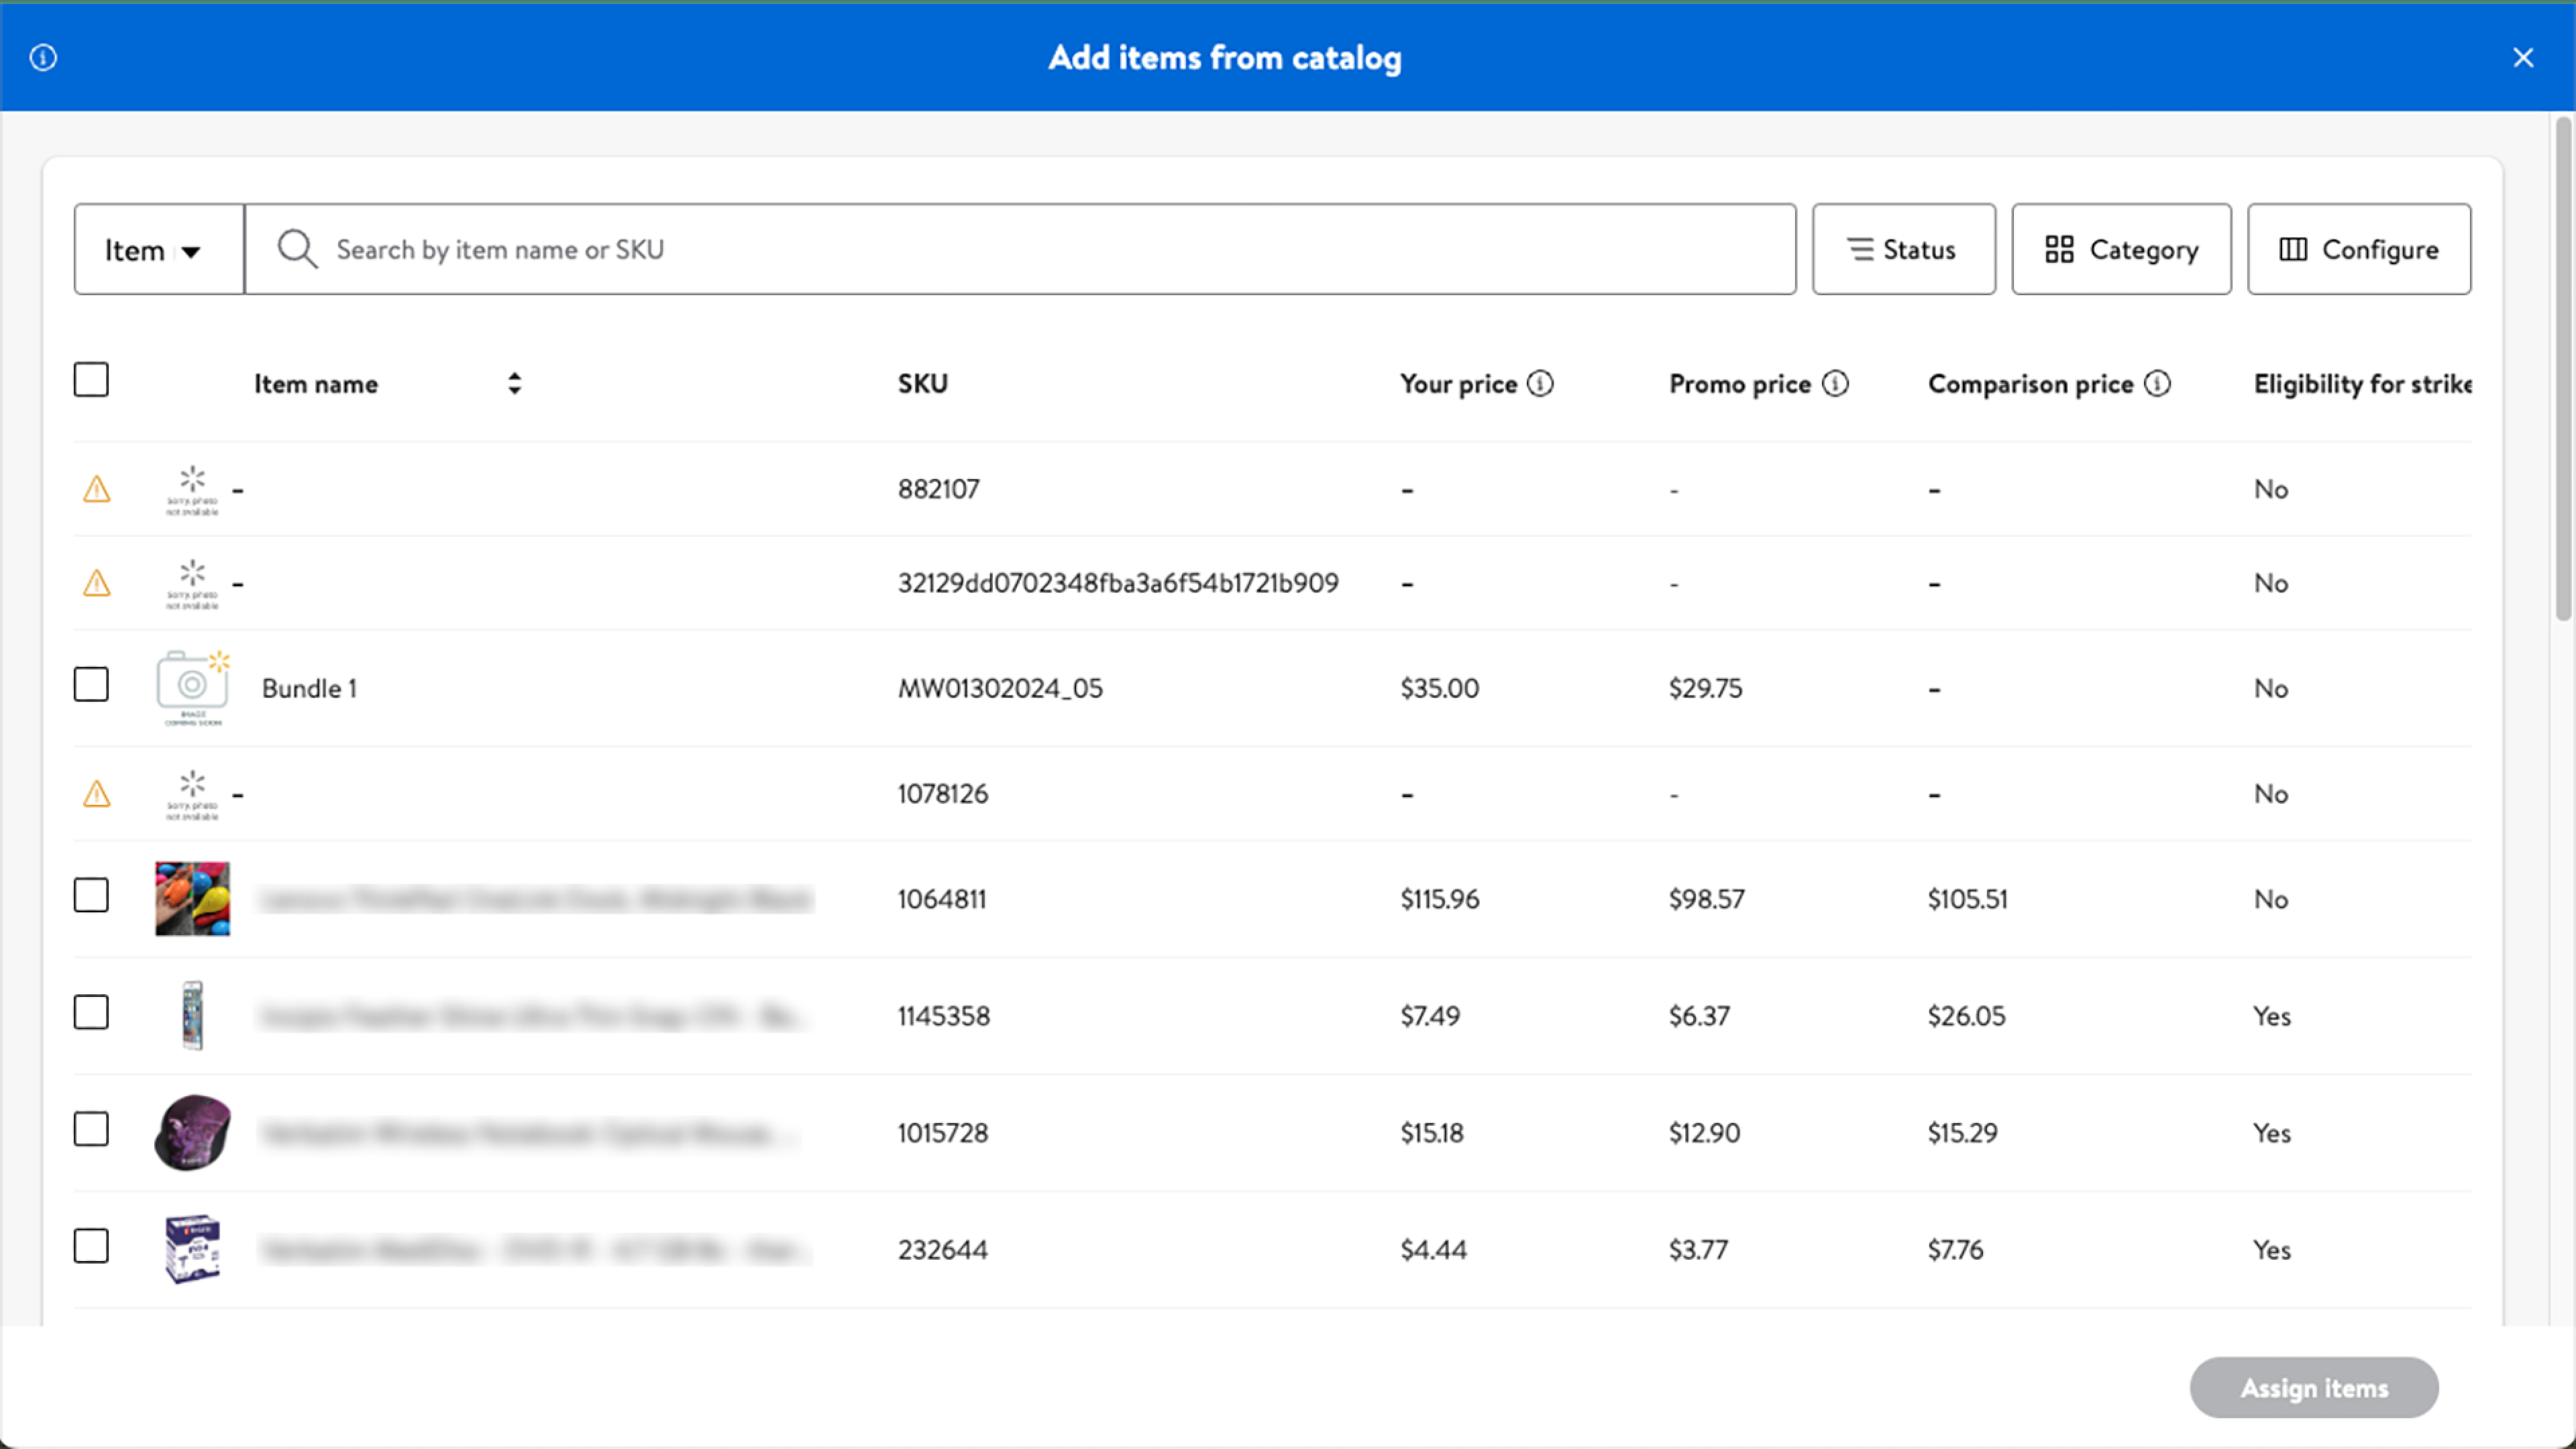
From Catalog:
After choosing your promotion from the Promotions page, select From catalog from the Assign items dropdown. Search for an item in your catalog by name or SKU to assign to this promo group. When selecting the Percentage off or Amount off value, the promo price is auto-filled based on the strikethrough promo group rule selected in Step 2. If you select the Custom promo price option, you’ll need to input the promo price.
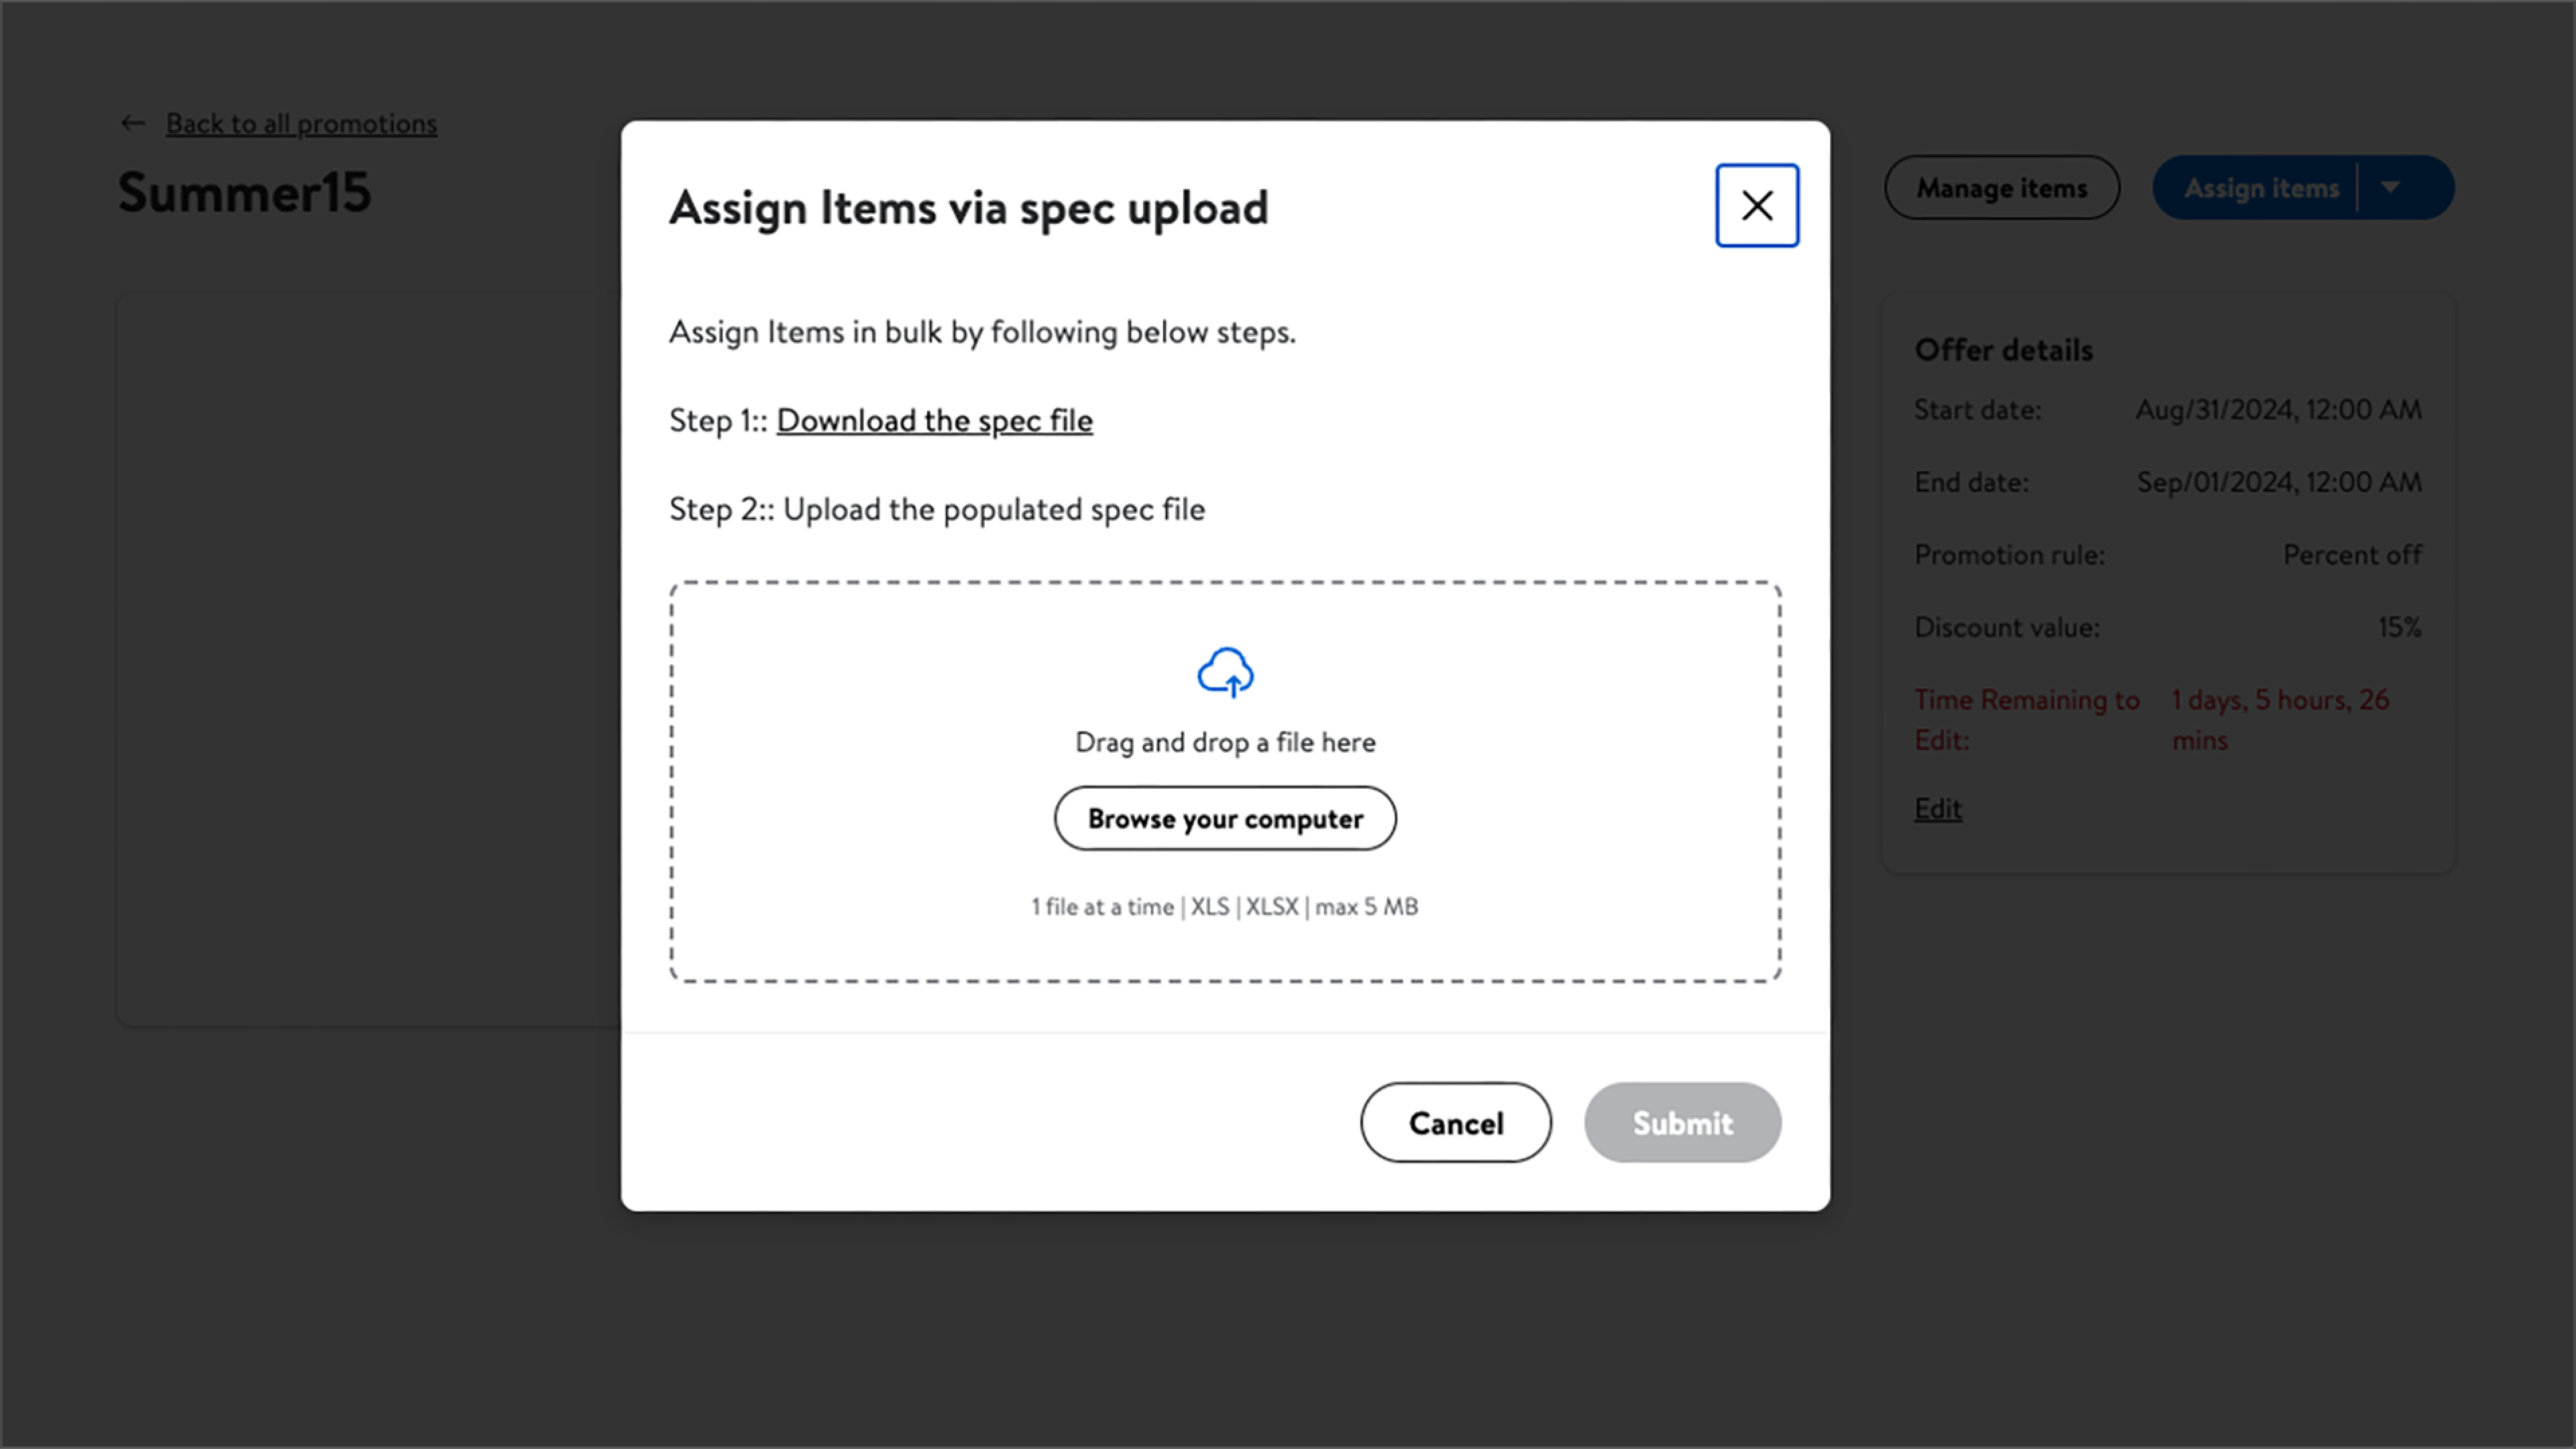
From a template:
After choosing your promotion from the Promotions page, select Upload a spec file from the Assign items dropdown. Download the template and complete the following information:
Required:
SKU: Fill in the SKU you’d like to assign to the promo group.
Promo Price: Define a promo price for an item only if you select the custom promo price as the strikethrough promo group rule in Step 2.
Optional:
Price Placement: Price Placements only display the promotional price in the customer’s shopping cart during the checkout process when the item is listed for less than the Minimum Advertised Price (MAP).
Promo Type: Promo Types are identified on Walmart.com with a Reduced Price or a Clearance flag and a strikethrough the Was Price or List Price.
Once you select Assign items or upload the spec sheet, you can use the Feed ID to track the progress of your promotions. Once the promotion is available, it’ll be visible in the Promotions page either Active or Scheduled status.