Getting started
Item setup
Catalog management
Seller Fulfillment Services
Listing optimization
Order management
Taxes & payments
Policies & standards
Growth opportunities
Advertising
Walmart Fulfillment Services (WFS)
Admins and Operations users can add users in bulk rather than setting each up individually. They simply follow the steps in the UI, which include filling out and uploading a template we provide, and up to 1,000 users are quickly processed and added all at once. If any errors occur during the bulk upload, we even provide info and instructions to help resolve the specific error for every single failed user.
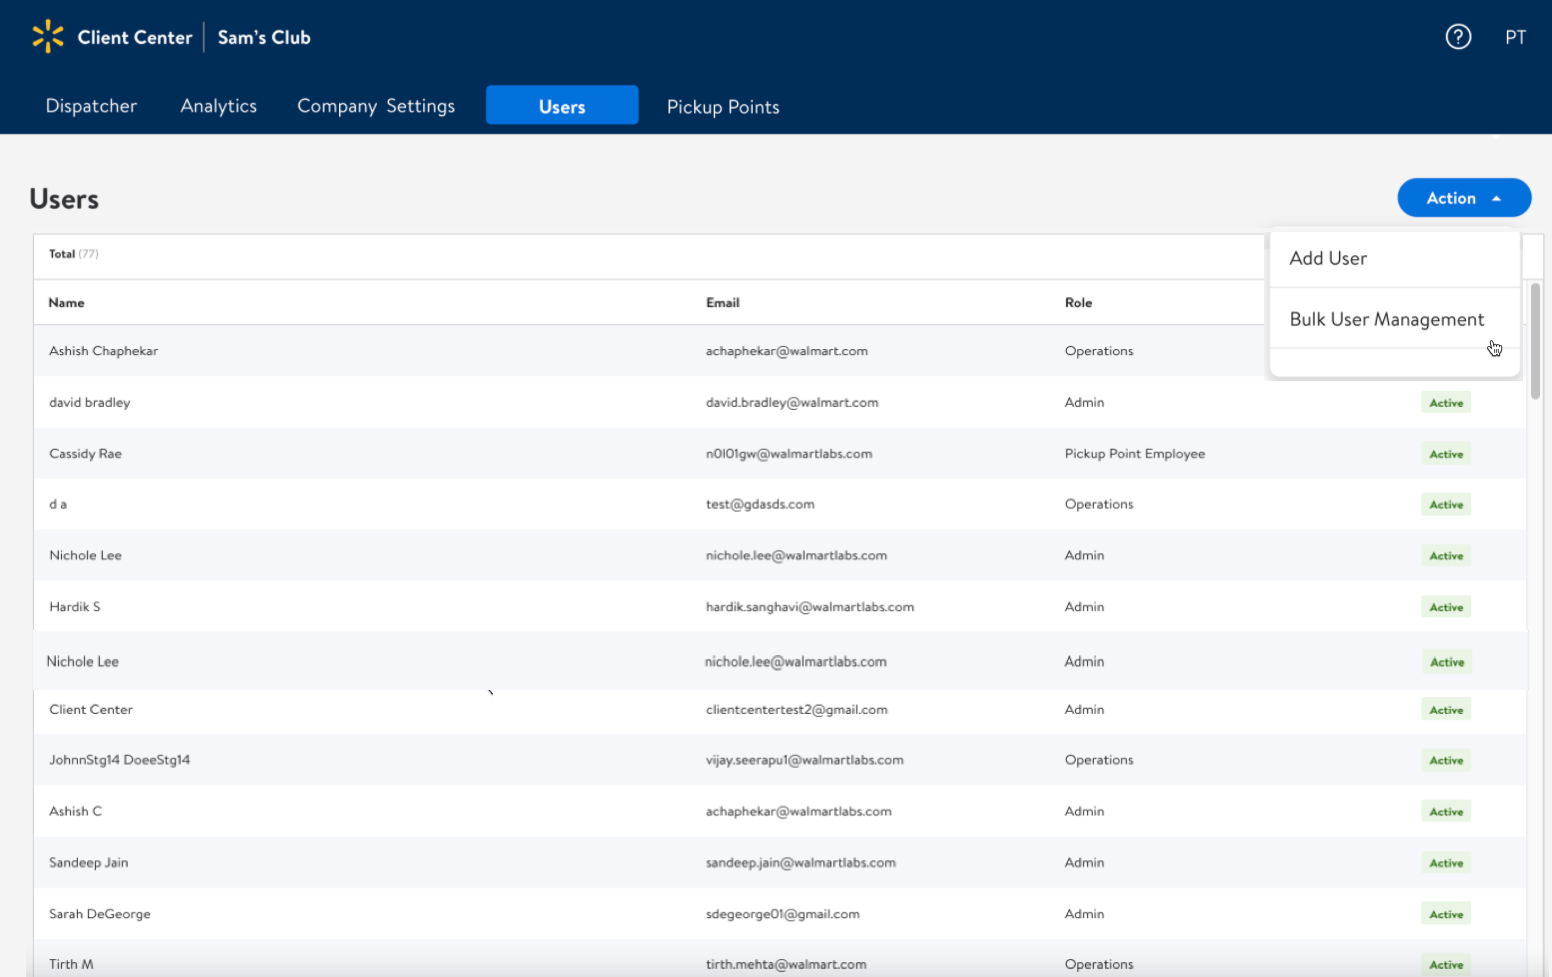
From the Users page, click the Actions drop-down menu, and select Bulk user management.

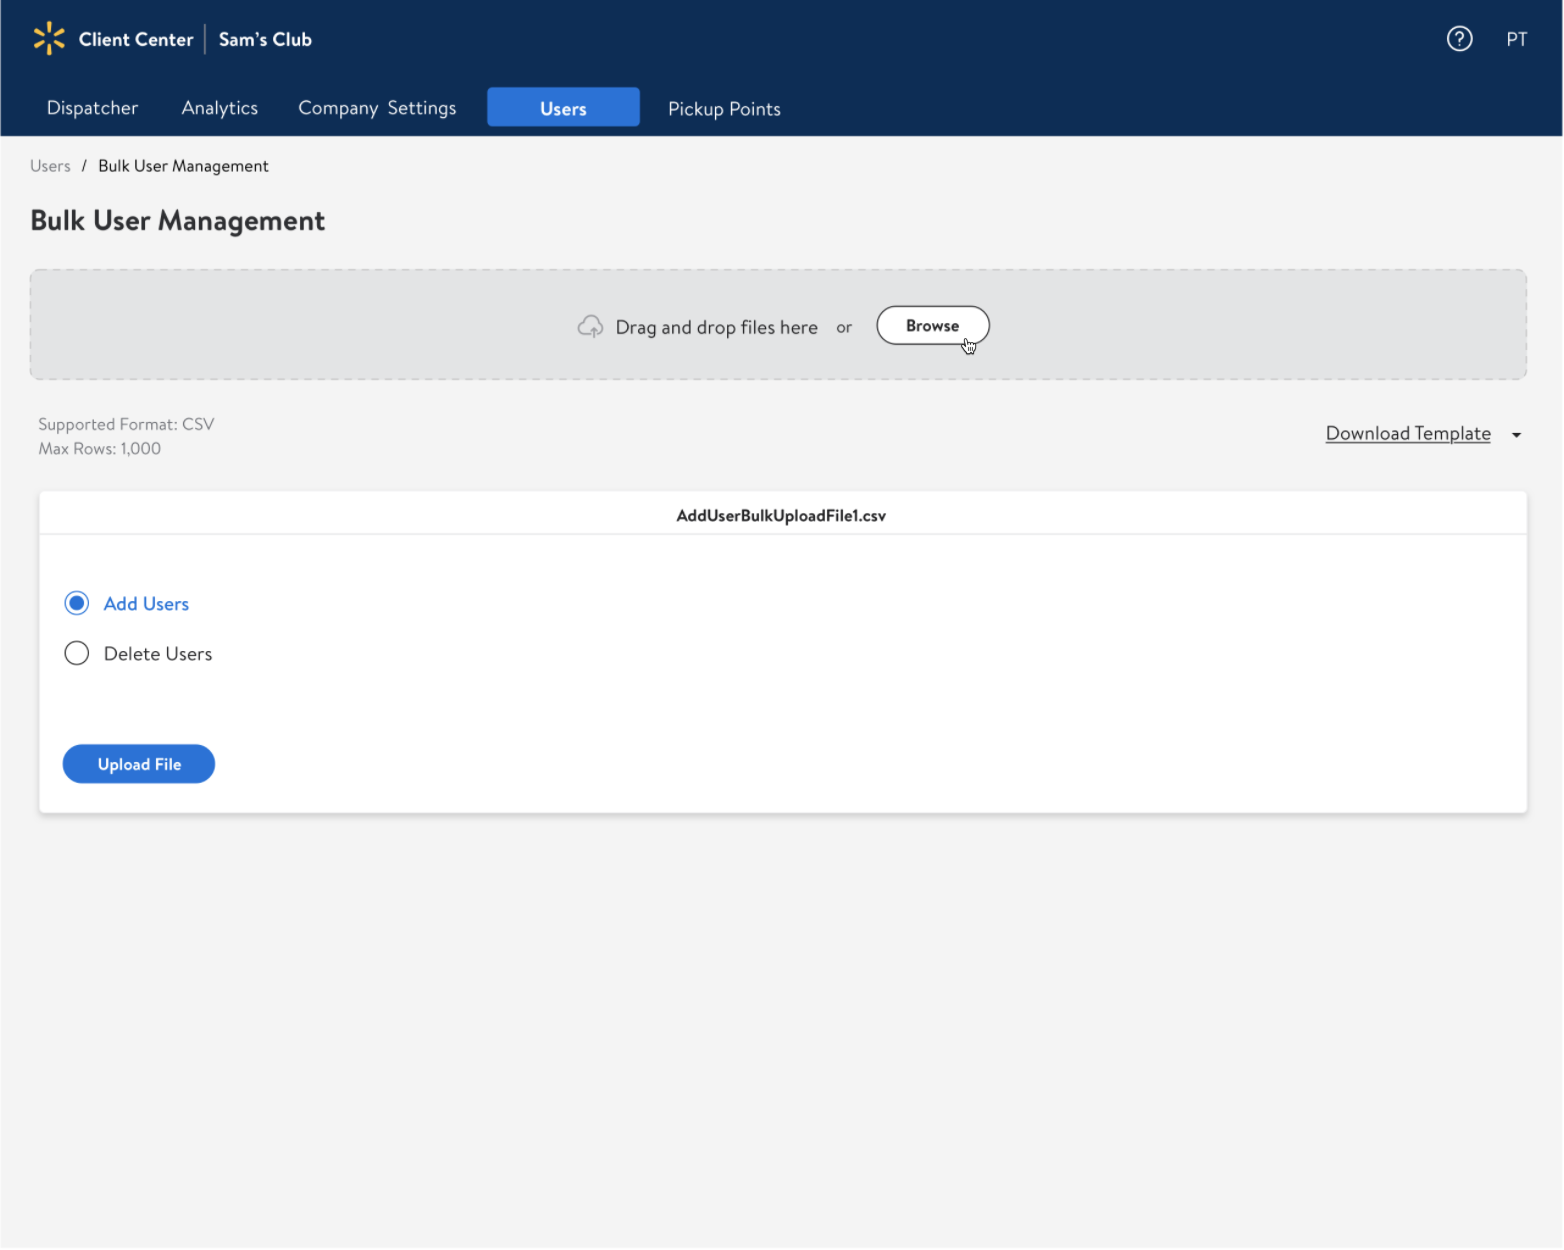
Click the Download template link and select which template you'd like to download: add users or delete users.
Alternatively, you can download the templates here:Here are some helpful notes about filling out the template:
The prewritten text in each cell is meant to guide you in correctly filling out the table. Be sure to remove it as you input info (row 2).
Don't edit any of the column headers.
You must enter the user role as one of these formats: CLIENT_ADMIN (for Company Admin), CLIENT_OPERATIONS (for Company Operations), or CLIENT_STORE (for Pickup Point Employee).
Either the Internal pickup point ID OR External pickup point ID field is required when assigning users to a CLIENT_STORE (Pickup point employee) role.
The template needs to be saved as CSV with comma separated strings.
The client ID should refer to the ID that’s associated with the client company. We need to know which company to assign each user to.
The External pickup point ID is an ID we use for integration. It's typically an ID that the company already uses for a Pickup Point. If adding a user with the role CLIENT_STORE (Pickup Point Employee), this field OR the Internal pickup point ID is required. You can leave one of the fields blank or input info for both in this case.
Neither External pickup point ID or Internal pickup point ID is required when adding a user with a CLIENT_ADMIN or CLIENT_OPERATIONS role.
Enter an unregistered email for the new user. Since you're adding a new user, it should be a user that isn’t previously registered.
Once you've filled out the template and saved it to your device, drag and drop the file or click the Browse button.

Select whether you want to add or delete the users added in the template, and click the Upload file button. You can leave the page and come back to check the progress of the upload. If you come back to the page at any future date, you'll see a list of the last files processed (if any) in the past 30 days.
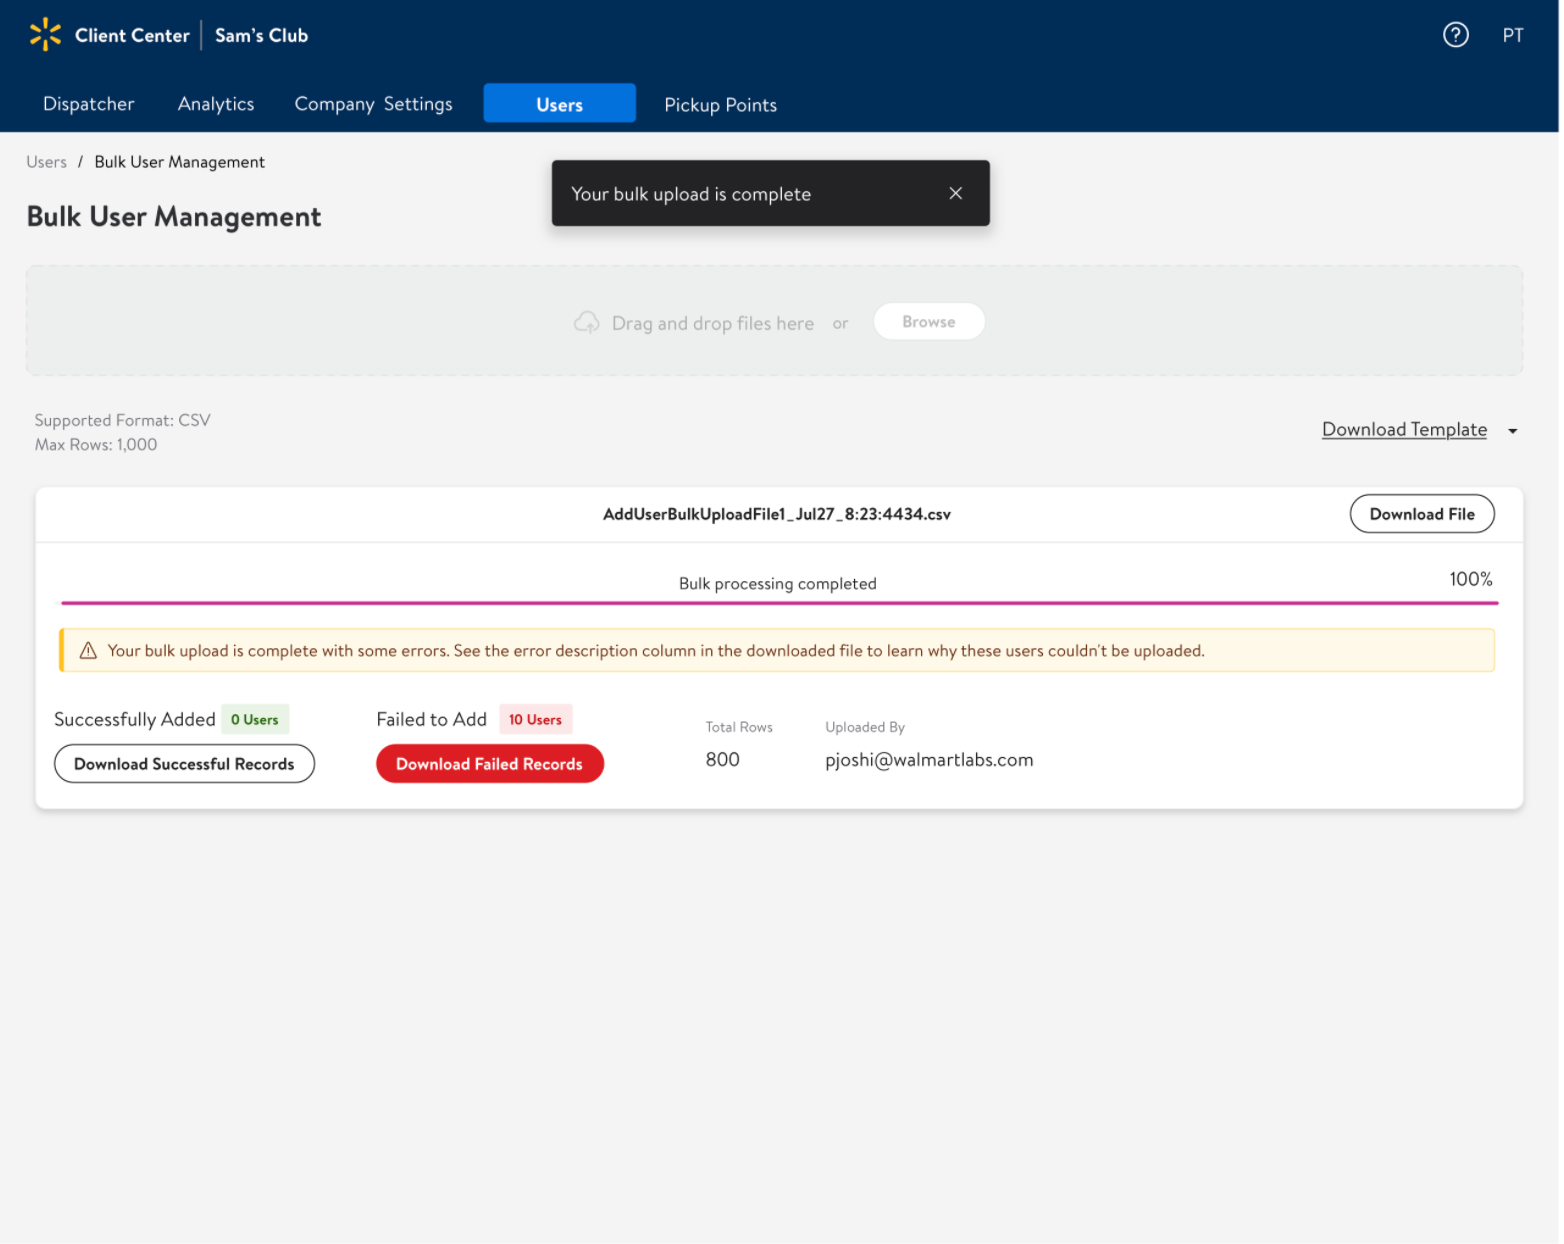
Once the upload is complete, you'll see the number of successfully added users and the users that failed to upload. To see the users that couldn't be uploaded, along with the reason for each failed user upload, click the red Download failed records button.
To see the users that we uploaded successfully, click the white Download successful records button.
You can refer back to the original document you uploaded by clicking the Download file button.

Make sure to save the template as a CSV format with comma separators. Right now we can only process one bulk upload at a time.
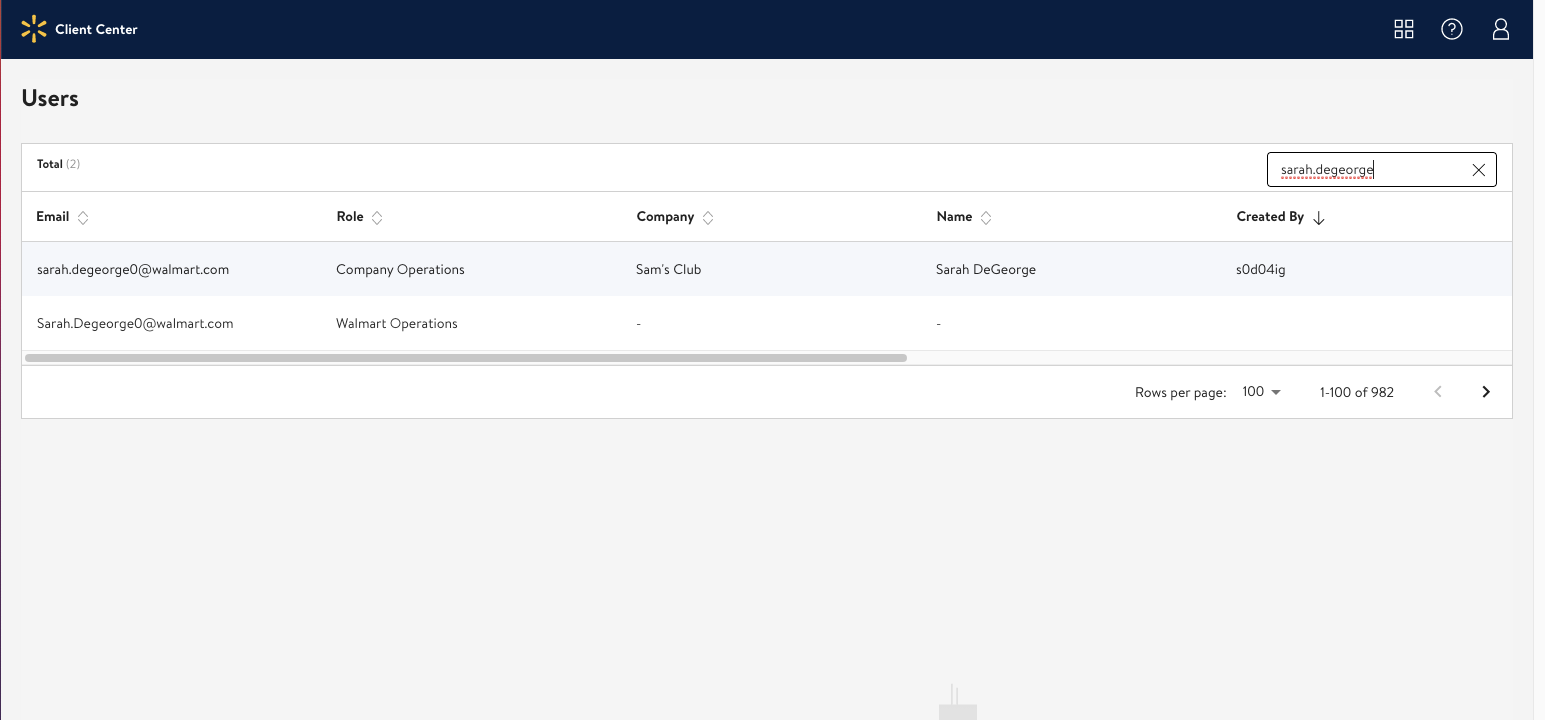
After you've completed this process, you can go to the User management page and use the search bar to find new users or sort the columns in ascending or descending order. The Created by and Created time columns are most useful for this.
