If you’re an admin user, you can add, edit, delete or update contact information from your Seller Center account at any time. These designated points of contact can communicate between your business and Walmart on your behalf. In this guide, you’ll learn how to update this information.
You’re responsible for assigning at least one contact for each category, and you’re responsible for adding and updating your contacts regularly. Contacts must be added to the Address book before they can be assigned to a category. Distribution lists may be used to notify multiple people from your organization at once, but they can't be used for primary contacts.
Manage contact information
Step 1 – Get started
Navigate to the Manage contacts and roles page in Seller Center.
Step 2 – Update existing contact information
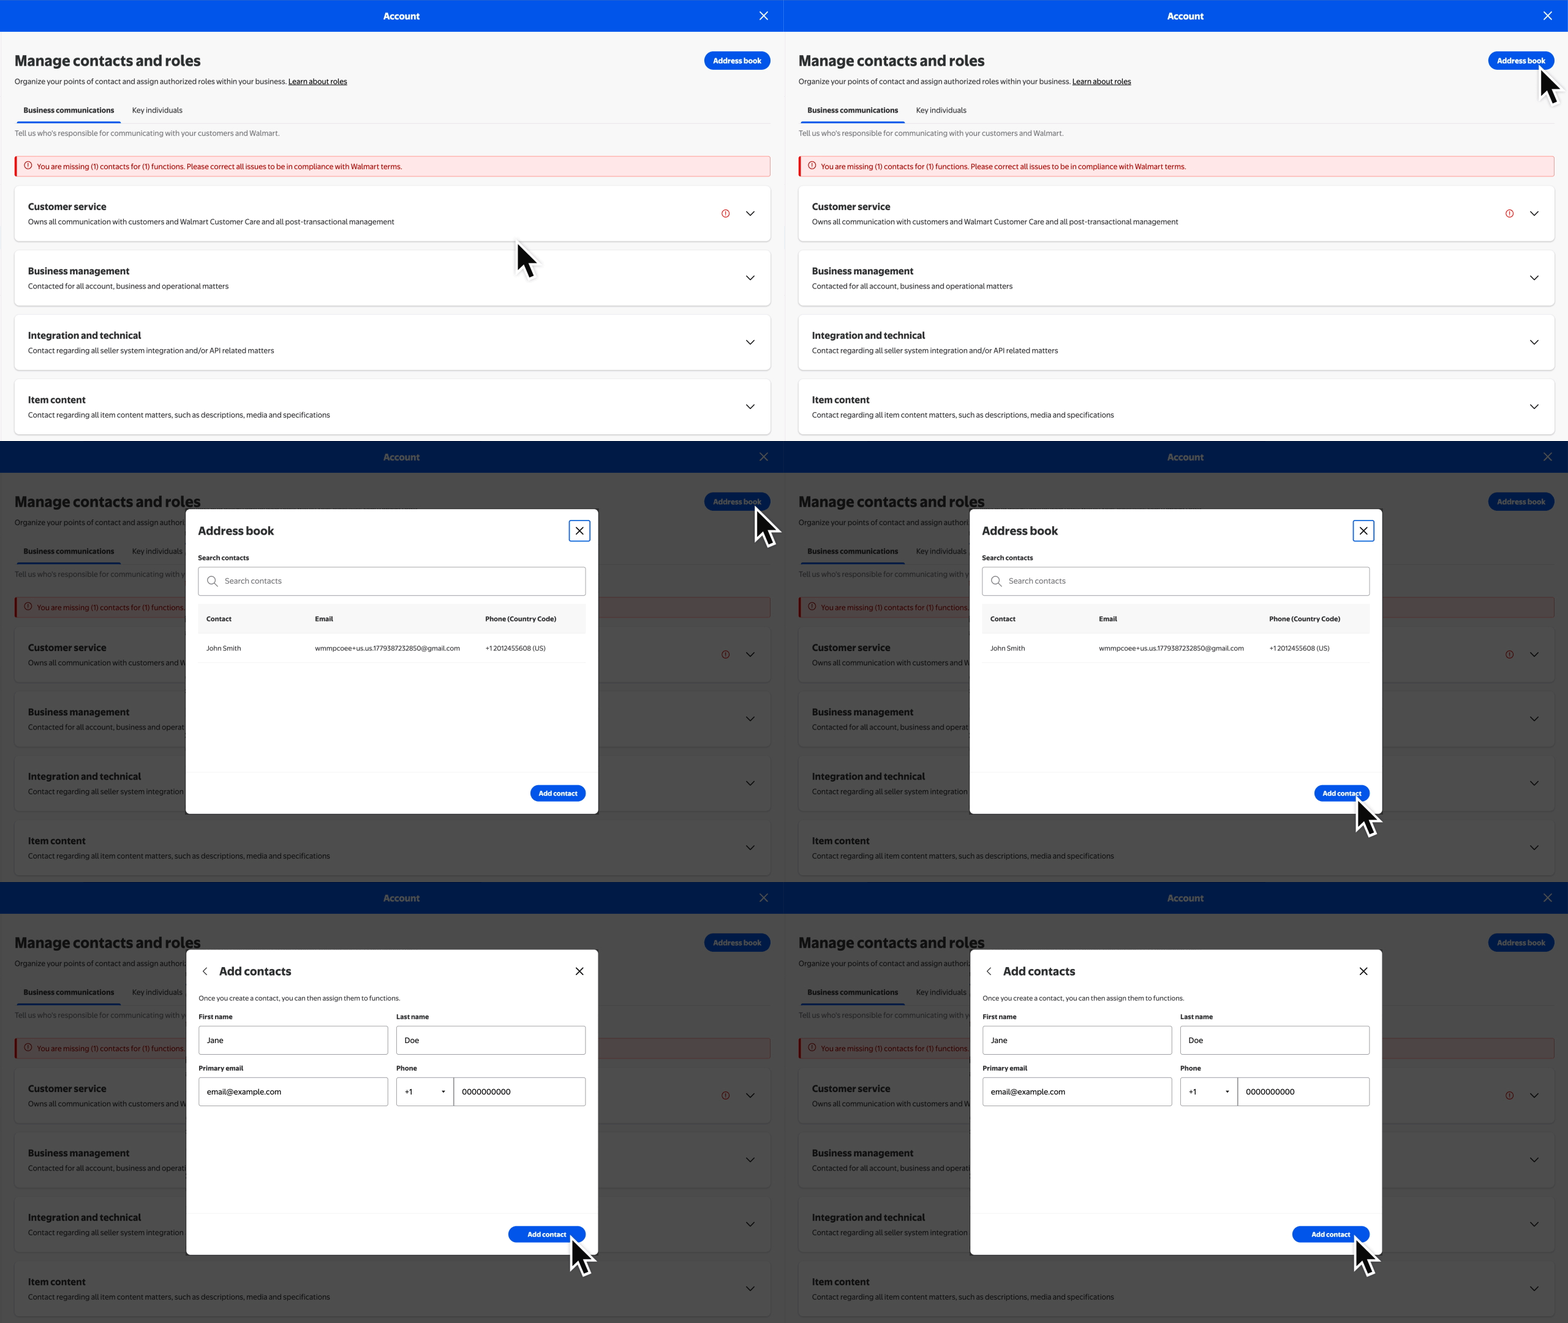
There are two types of contacts: business communication contacts who are responsible for communicating with customers and Walmart, and key individuals who hold important roles within your organization. Select the Address book button to add, edit or delete contacts.
Add contacts: Choose Add contact. Fill out the fields, then select Add contact to save.
Edit contacts: Select the contact whose information you want to edit. Fill out the fields you’d like to update, then select Save changes. If you need to update your primary business contact, select the Help button in the Seller Center menu bar to contact Support.
Email addresses cannot be edited.
- Delete contacts: Key individual contacts cannot be deleted. If you want to delete a primary contact, you must first designate another as the primary. To delete a contact, select the name you wish to remove. On the next screen, choose Delete contact. Confirm your selection on the next page.
- Update key individual contacts: From the Manage contacts and roles page, select the Key individuals tab. Select Assign and replace role, then choose a contact from the available list, search your Address book or add a new contact to assign as your primary. Complete the two-step verification to add the required contact details.
Step 3 - Assign roles
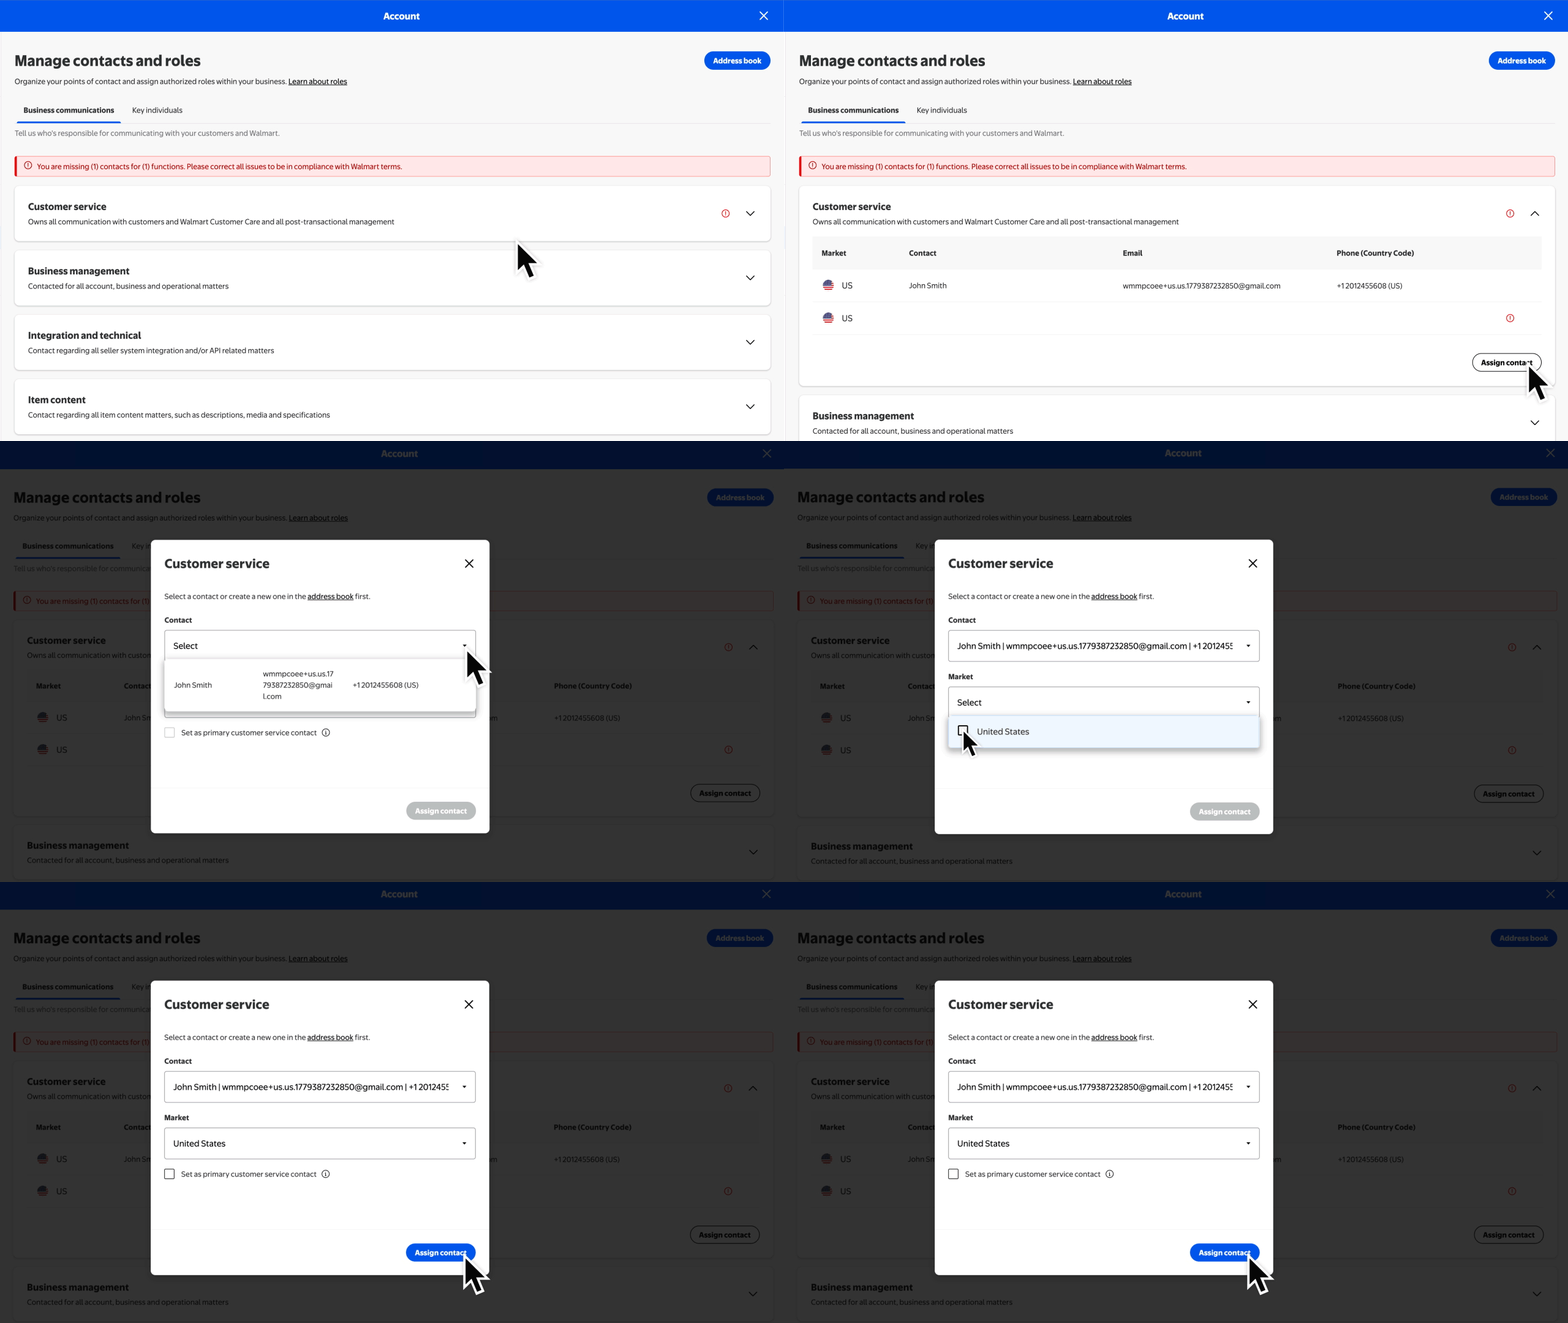
Once you’ve added a contact to your Address book, you can assign them to multiple roles. From the Manage contacts and roles page, you can assign various business communication and key individual roles.
Business communication roles: select the Business communications tab and navigate to the section that corresponds to the role. Select the down arrow and choose Assign contact. Select the contact and market to assign the role, then select Assign contact to confirm your changes. Repeat this process for each role you want to assign to that contact.
Key individual roles: Select the Key individuals tab and Select Assign and replace role, then choose a contact from the available list, search your Address book or add a new contact to assign as your Account primary or other key role.
All Key individuals must be verified for each contact added for each market. If requested, upload documentation to verify their identity. When finished, submit your request for approval. Return to the Key individuals tab to check approval status.
For updates to the primary contact or legal representative in China or Hong Kong, use these templates to upload additional required support documentation.