Getting started
Item setup
Catalog management
Listing optimization
Order management
Taxes & payments
Policies & standards
Growth opportunities
Shipping & fulfillment
Shipping Templates
Map SKUs to Shipping Templates
Shipping Templates in Seller Center
Shipping methods
Fulfillment settings
Ship with Walmart
Walmart Fulfillment Services (WFS)
Walmart Fulfillment Services (WFS)
Other Topics


Shipping templates enable sellers to manage and configure their shipping settings in Seller Center by utilizing several variables such as shipping regions, transit times, and shipping rates. Each marketplace seller can create up to 60 shipping templates and map specific SKUs to each template.
Access Shipping Templates
To modify or set up your shipping settings,
- Select Settings at the top of the Seller Center homepage.
Choose Shipping Templates located under the Shipping Profile section - There are two types of Shipping Templates: Default and Custom.
Default Shipping Template
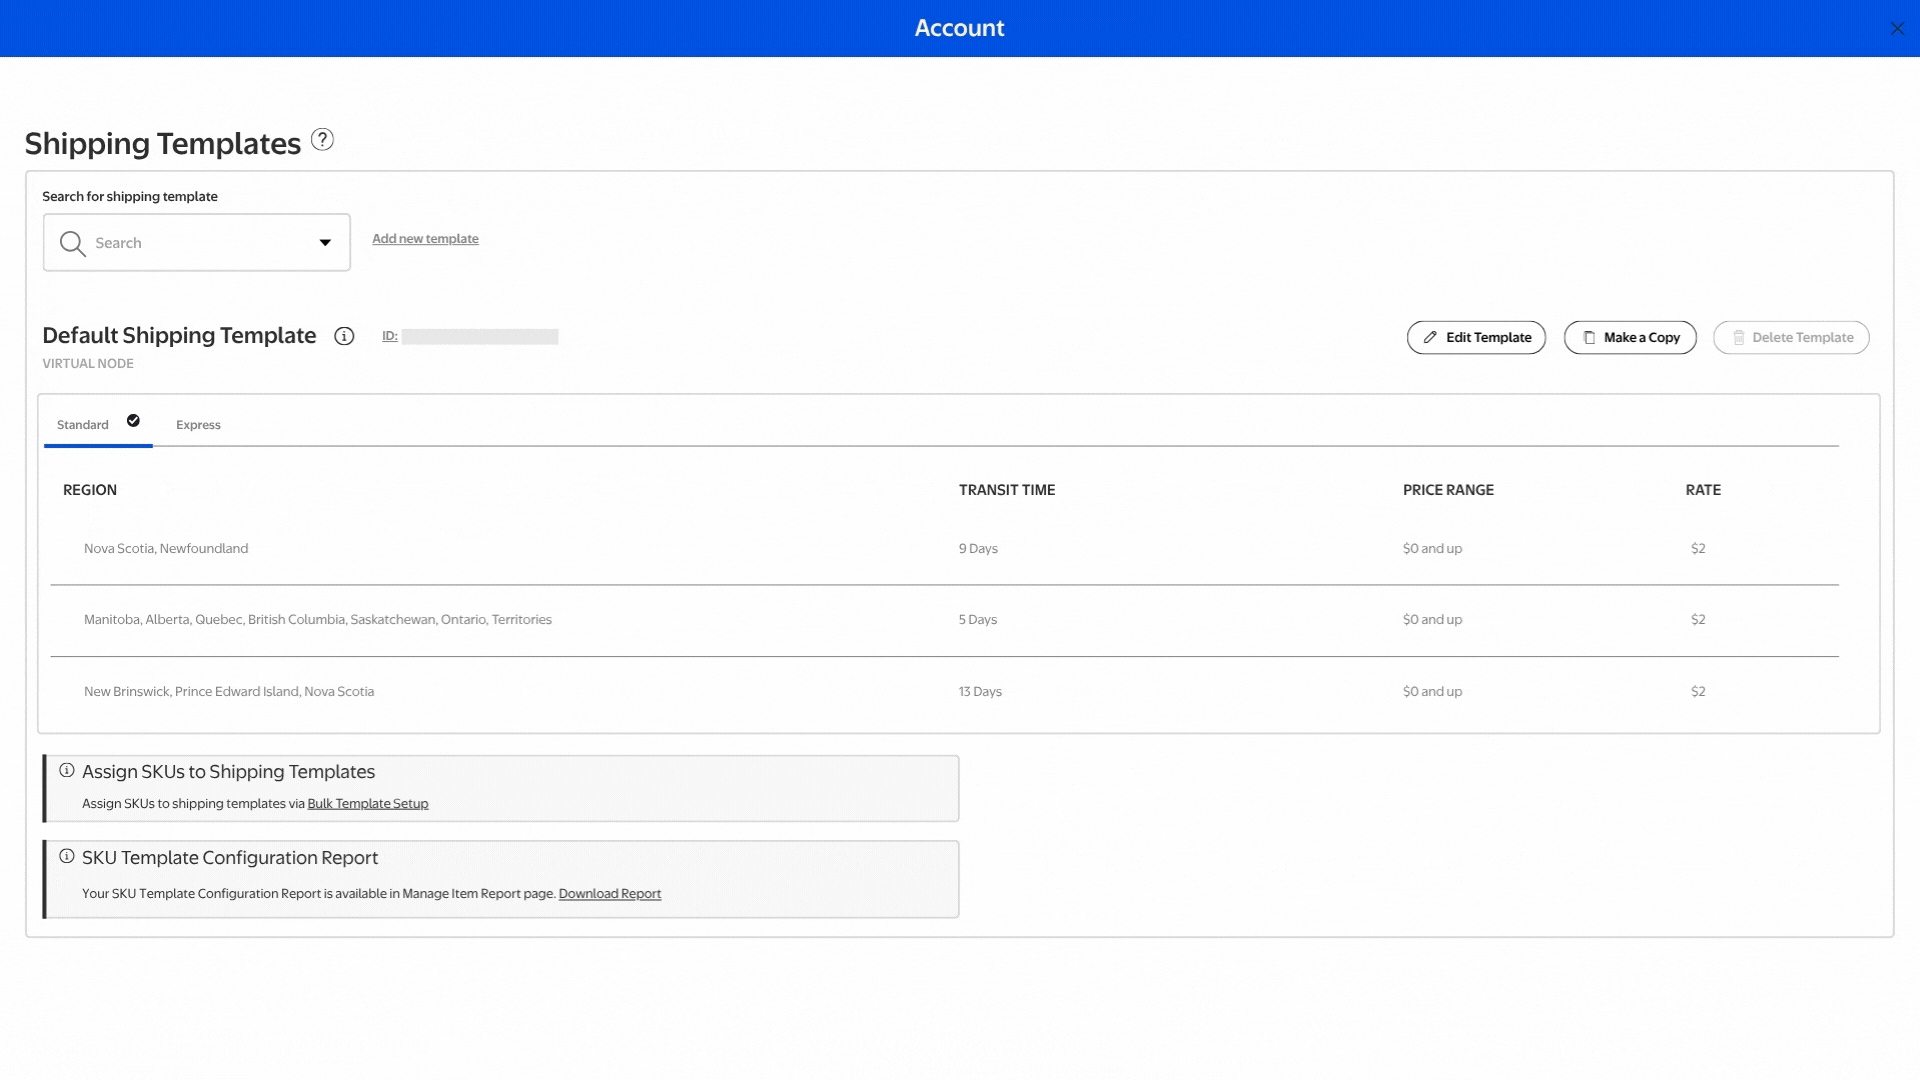
Each Seller Center account has one default Shipping Template. You can edit the default template, but you cannot delete it. The configurations are automatically applied to your entire catalog unless SKUs are mapped to a custom template.
- You can view the Default template settings by selecting Default Shipping Templates on the left-side of the dashboard.
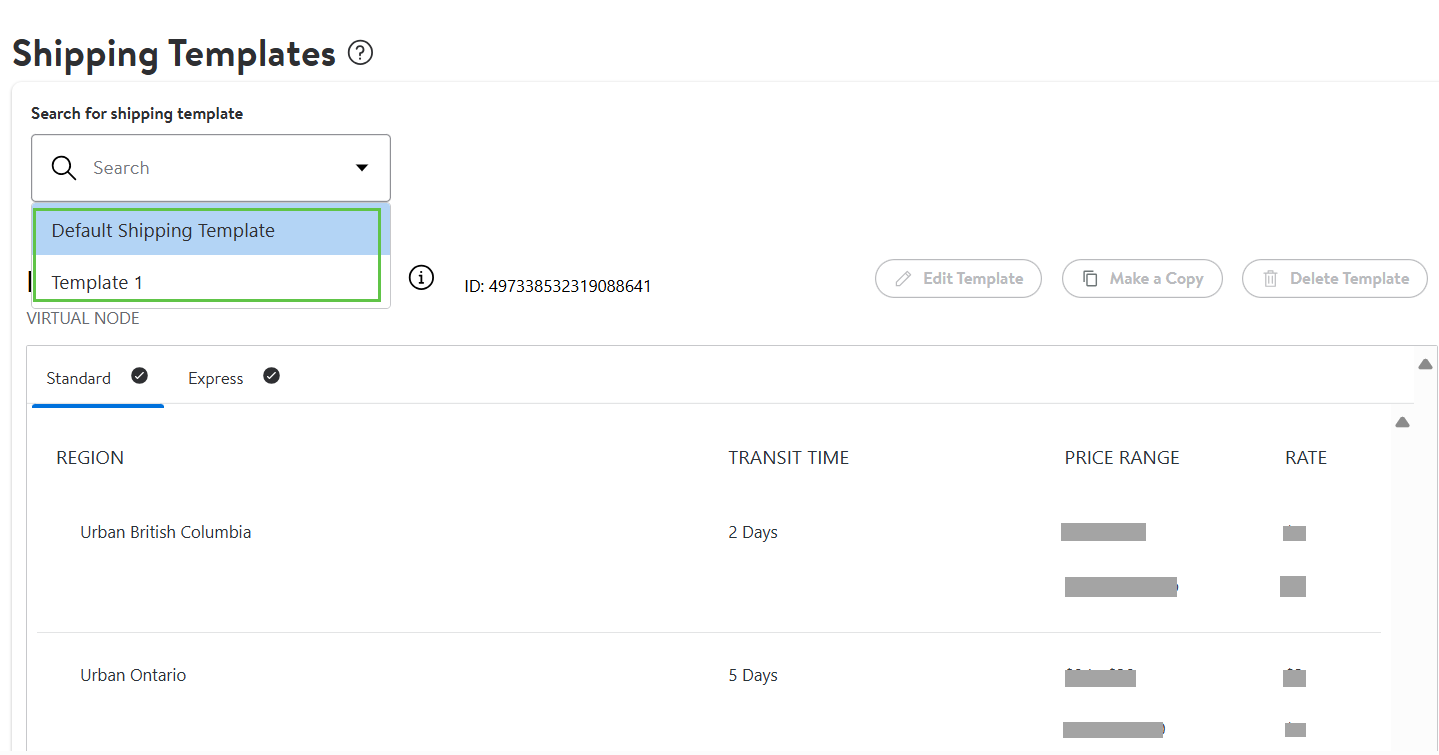
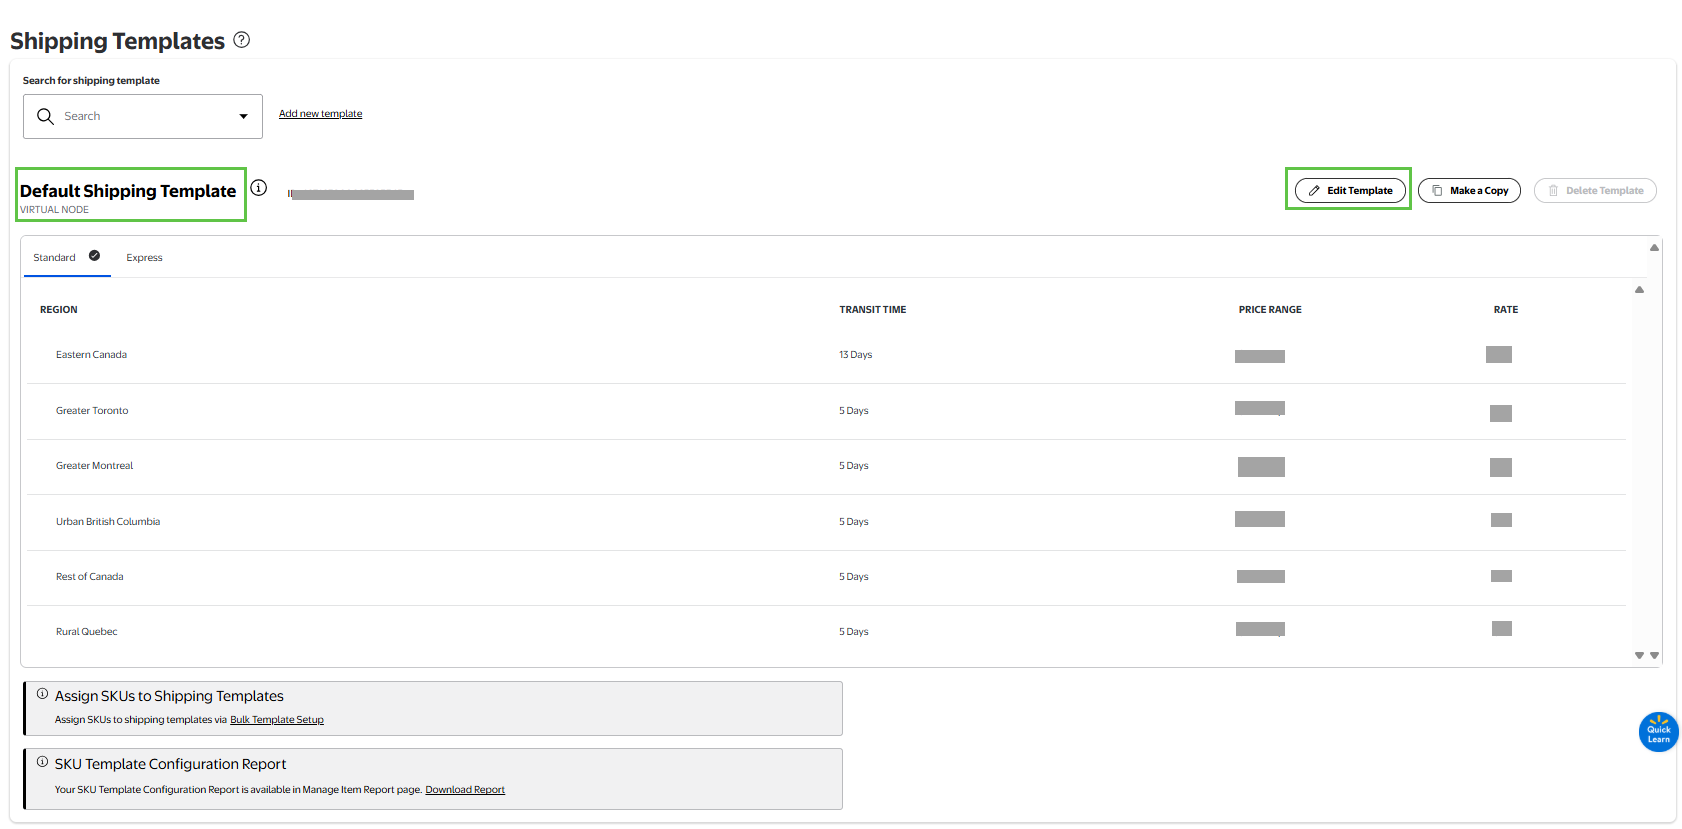
- Select each shipping method tab (Standard, Express) to view the selected address types, enabled regions, transit times, and shipping fees.
- The Default template is displayed by default whenever a seller reaches the Shipping Templates tab.
Custom Shipping Template
- You can create up to 60 different Custom Shipping Templates for your seller-fulfilled items.
- If your SKUs are not mapped to a customized shipping template, the items will reflect the settings set in the Default Shipping Template. This includes transit times and delivery estimates.
- Click on Add a New Template beside the search box.
Click on Edit Template and enter the name of your choice to label your new, custom template.
Save the changes made to the name.
Next, choose the Shipping Rate Model and Standard or Express options.
Continue to customize your shipping template by clicking on Add Shipping Rule.
- You can add rules to modify the promise (Transit Times and Shipping Costs) for different regions.
- One region is allowed in one rule per template, so you need to remove a region from the default (first) rule before you modify the promise for that region in a new rule.
6. Click on Save Template once you’re done.
To avoid feed failure, you must wait a minimum of four hours after creating a new template before you can assign SKUs.
Manage Shipping Templates
You can edit and delete templates (custom only).
- Select Edit Template. When you select a shipment template, you will see the current configurations for Standard or Express listed with the shipping regions.
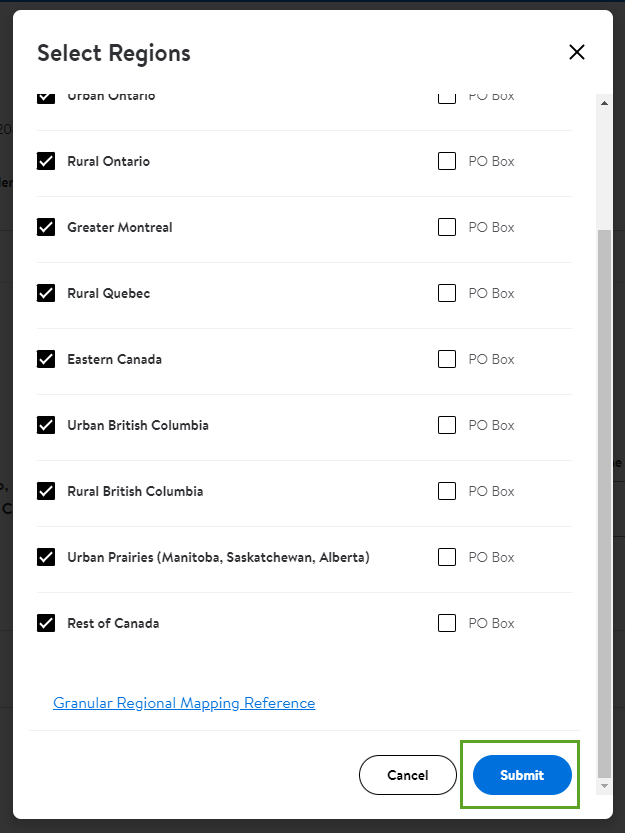
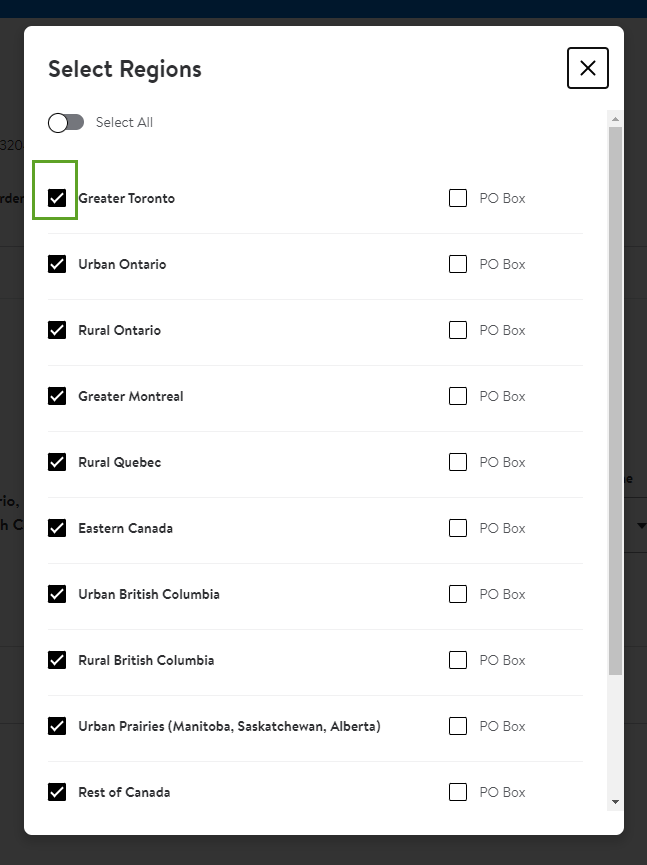
2. Select the Edit Regions button under the map to change the shipping range of the template.
3. Select the check box to the left of each region to add or remove a particular region. Remember, only one region is allowed per rule, you’ll need to remove that region from the first rule before you add it to another rule.
4. Once you have customized the regions for your Shipping Template, select the Submit button.